
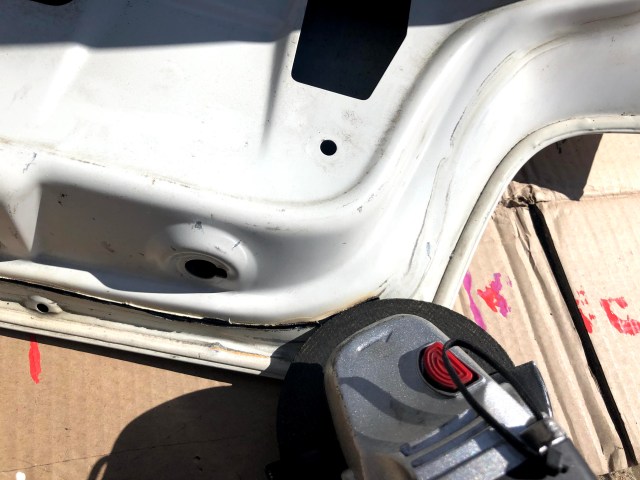
The trunk latch on my BMW E36 has been just barely limping along since I purchased the car. The previous owner did a pretty terrible repair job when the sheetmetal around the latch cracked. I’ve finally decided to do something about this and, while I’m already messing with the trunk, why not take a little metal out of it to reduce weight?

Look at that terribleness! JB Weld doesn’t fix everything. Instead of trying to repair this mess, why not just cut the whole thing out?
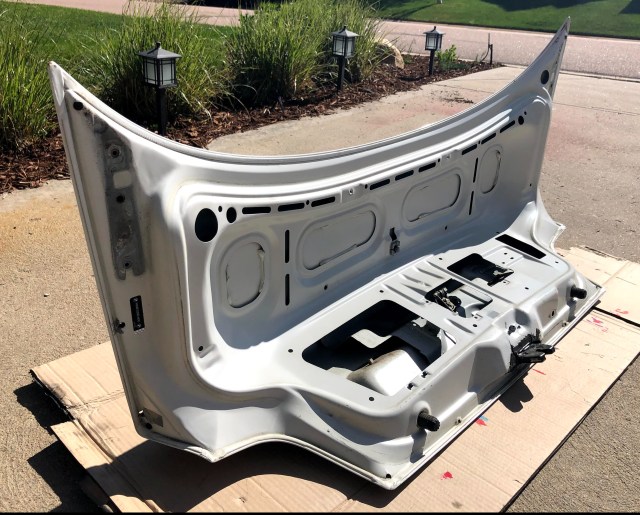
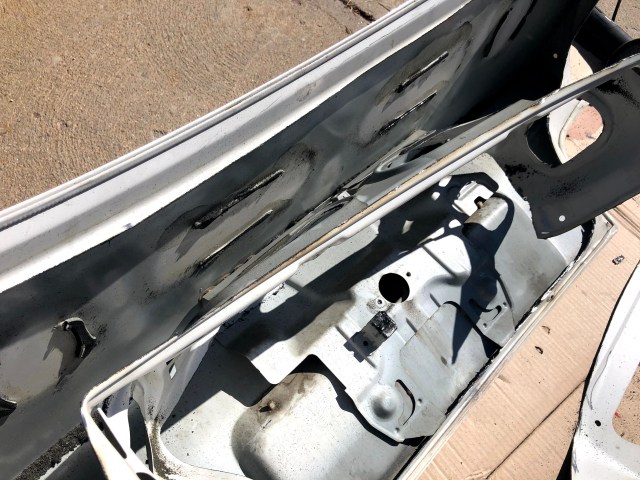
In the picture above, you can see that an E36 trunk is basically a big hollow shell. My plan was simply to remove the inside half of the shell. I’d never seen this done, didn’t know how it would affect structural rigidity, or how much weight it would actually remove. Let’s get into it and find some answers!
The lower half of the inner shell was pretty easy to remove. A cutoff saw with an abrasive cutting disc made pretty quick work of it. I made sure to only remove metal that’s inside the foam weatherseal. That way the trunk would still be sealed against water. On my trunk, it was easy to see where the seal pressed against it as it had discolored that area.
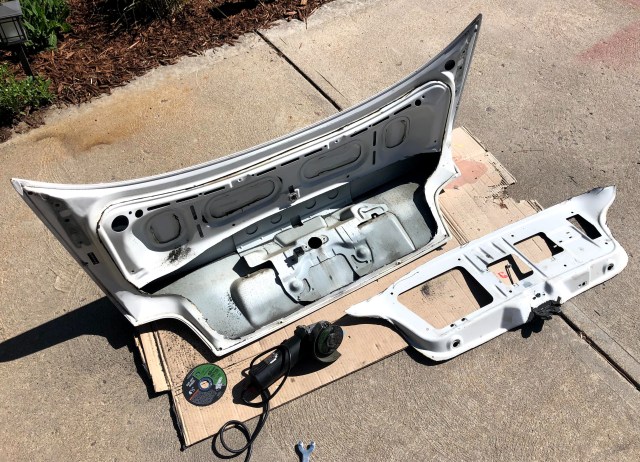
Lower half of the inner shell removed!
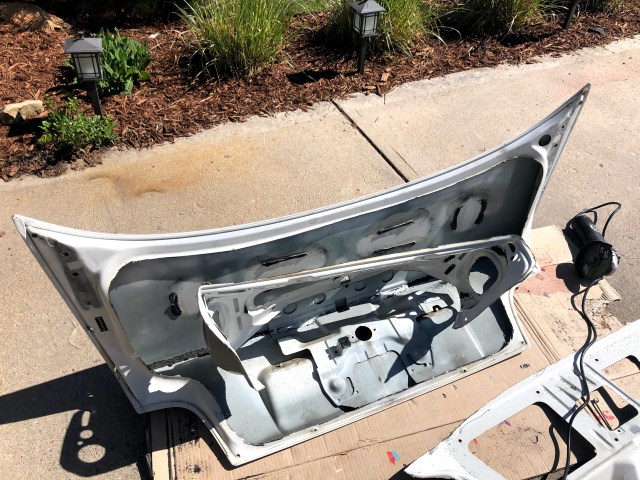
The upper half of the inner shell was much trickier. It easy to cut around the perimeter but the interior portion is bonded with epoxy to the outer shell. You can’t pry on it to get it out as you’ll just dent the exterior of the trunk. You don’t want to do that!
I ended up using a razor blade to cut through all the epoxy strips. It worked pretty well, just take your time.

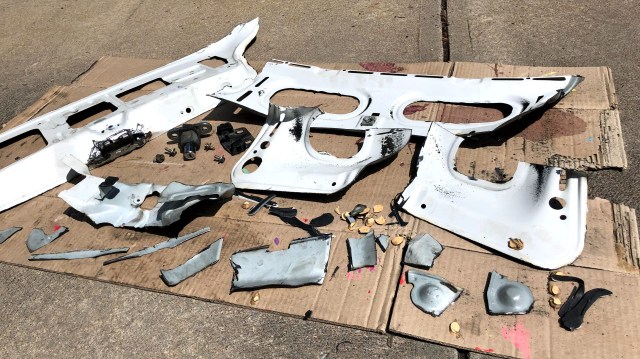
At this point the majority of the metal had been removed but I still had some further interior bracing to remove. This was definitely the most difficult part as everything is epoxied in place…

I just started cutting out a bunch of small sections of metal and worked on unsticking them individually. All those little yellow dots in the picture above are actually the epoxy. Keep working at it and you’ll eventually get most all of it.

I actually gave up trying to remove the final metal bracing because I was very concerned that I would harm the paint of the exterior trunk surface. I’d suggest you stop at this point too but good luck if you go further!
That’s a good bit of metal that’s been removed! Total weight removed was 7.0 lbs. The trunk initially weighed 23.6 lbs. So that means I got it down to 16.6 lbs. Funny enough, the rear wing that I put on my car weighs 7.0 lbs.
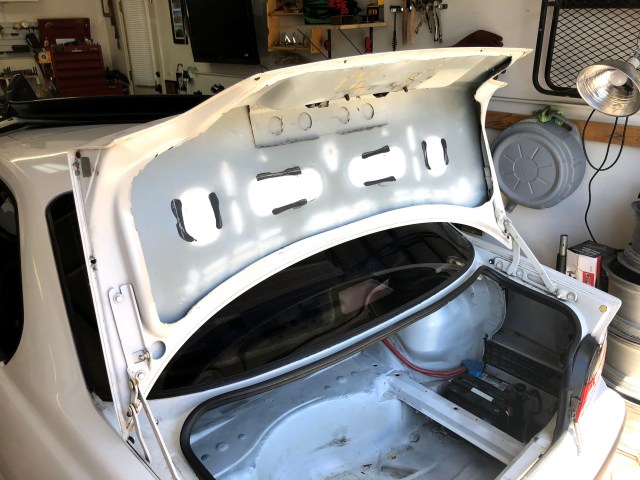
Here’s the trunk mounted back on the car. You’d never notice from the outside that the trunk has been lightened. It fits just like before and I haven’t noticed any added flexing or strange sounds while driving. But how should I latch it now?

I came across a picture of a race car using quick release spring latches to secure the trunk. I thought it looked like a really good idea that should be fairly easy to implement. I looked online and found some “Sparco” branded quick release spring latches but they were $40. That seemed way overpriced to me so I kept looking around and actually came across a lot of sellers on eBay, located in China, selling a good looking kit for only $7 shipped! Sure I would have to wait 3+ weeks for it to arrive but I was in no hurry. In the picture above you can see what arrived. I painted everything black, it was originally just all grey.

I placed the latches in a few different orientations on my E36 and then chose the one that I thought looked the best. The plan to attach them to the car was just drilling some holes and then pop riveting them in place. Make sure to measure twice and drill once! The picture above shows my final placement.

You need to place the upper spring latch in a place that will allow enough tension on the spring to keep the trunk secured over bumps. But not so much tension that you can’t get the trunk open without considerable effort. The picture above shows the final placement I used.

Here’s the final picture with the latches fully installed and the wing back back on. I think it’s a pretty nice setup, the trunk works way better, and the whole project only cost me $7 and a couple hours of time!
If you liked the information in this page, be sure to check out my Developments page for my most recent posts! Every single post is listed with a link on the Headquarters page.

is the trunk still holding up nice with the downforce of the spoiler?
LikeLike
Yes, I’ve had no problems at all. The wing is supported on the perimeter of the trunk, which still has full support.
LikeLike