There’s been a lot of parts, time and effort to get the S52 swap to this point but the final stage has finally come! In this post, I’m going to take you through the final steps of putting the S52 in place, plumbing in a Grassroots Performance oil cooler setup and installing a Spal puller fan on the radiator. The payoff is nearly here!

Before setting the S52 into place in the engine bay, I decided to clean things up really well, remove the old sound deadening material and install a new aluminized heat barrier (from Thermo Tec). My old sound deadening was falling apart and soaked with oil in a few places.
The adhesive backed Thermo Tec aluminized heat barrier went on very easily and seems pretty high quality. I installed it on the firewall directly behind the engine, inside the transmission tunnel and on the frame rail / strut tower on the exhaust side of the engine.

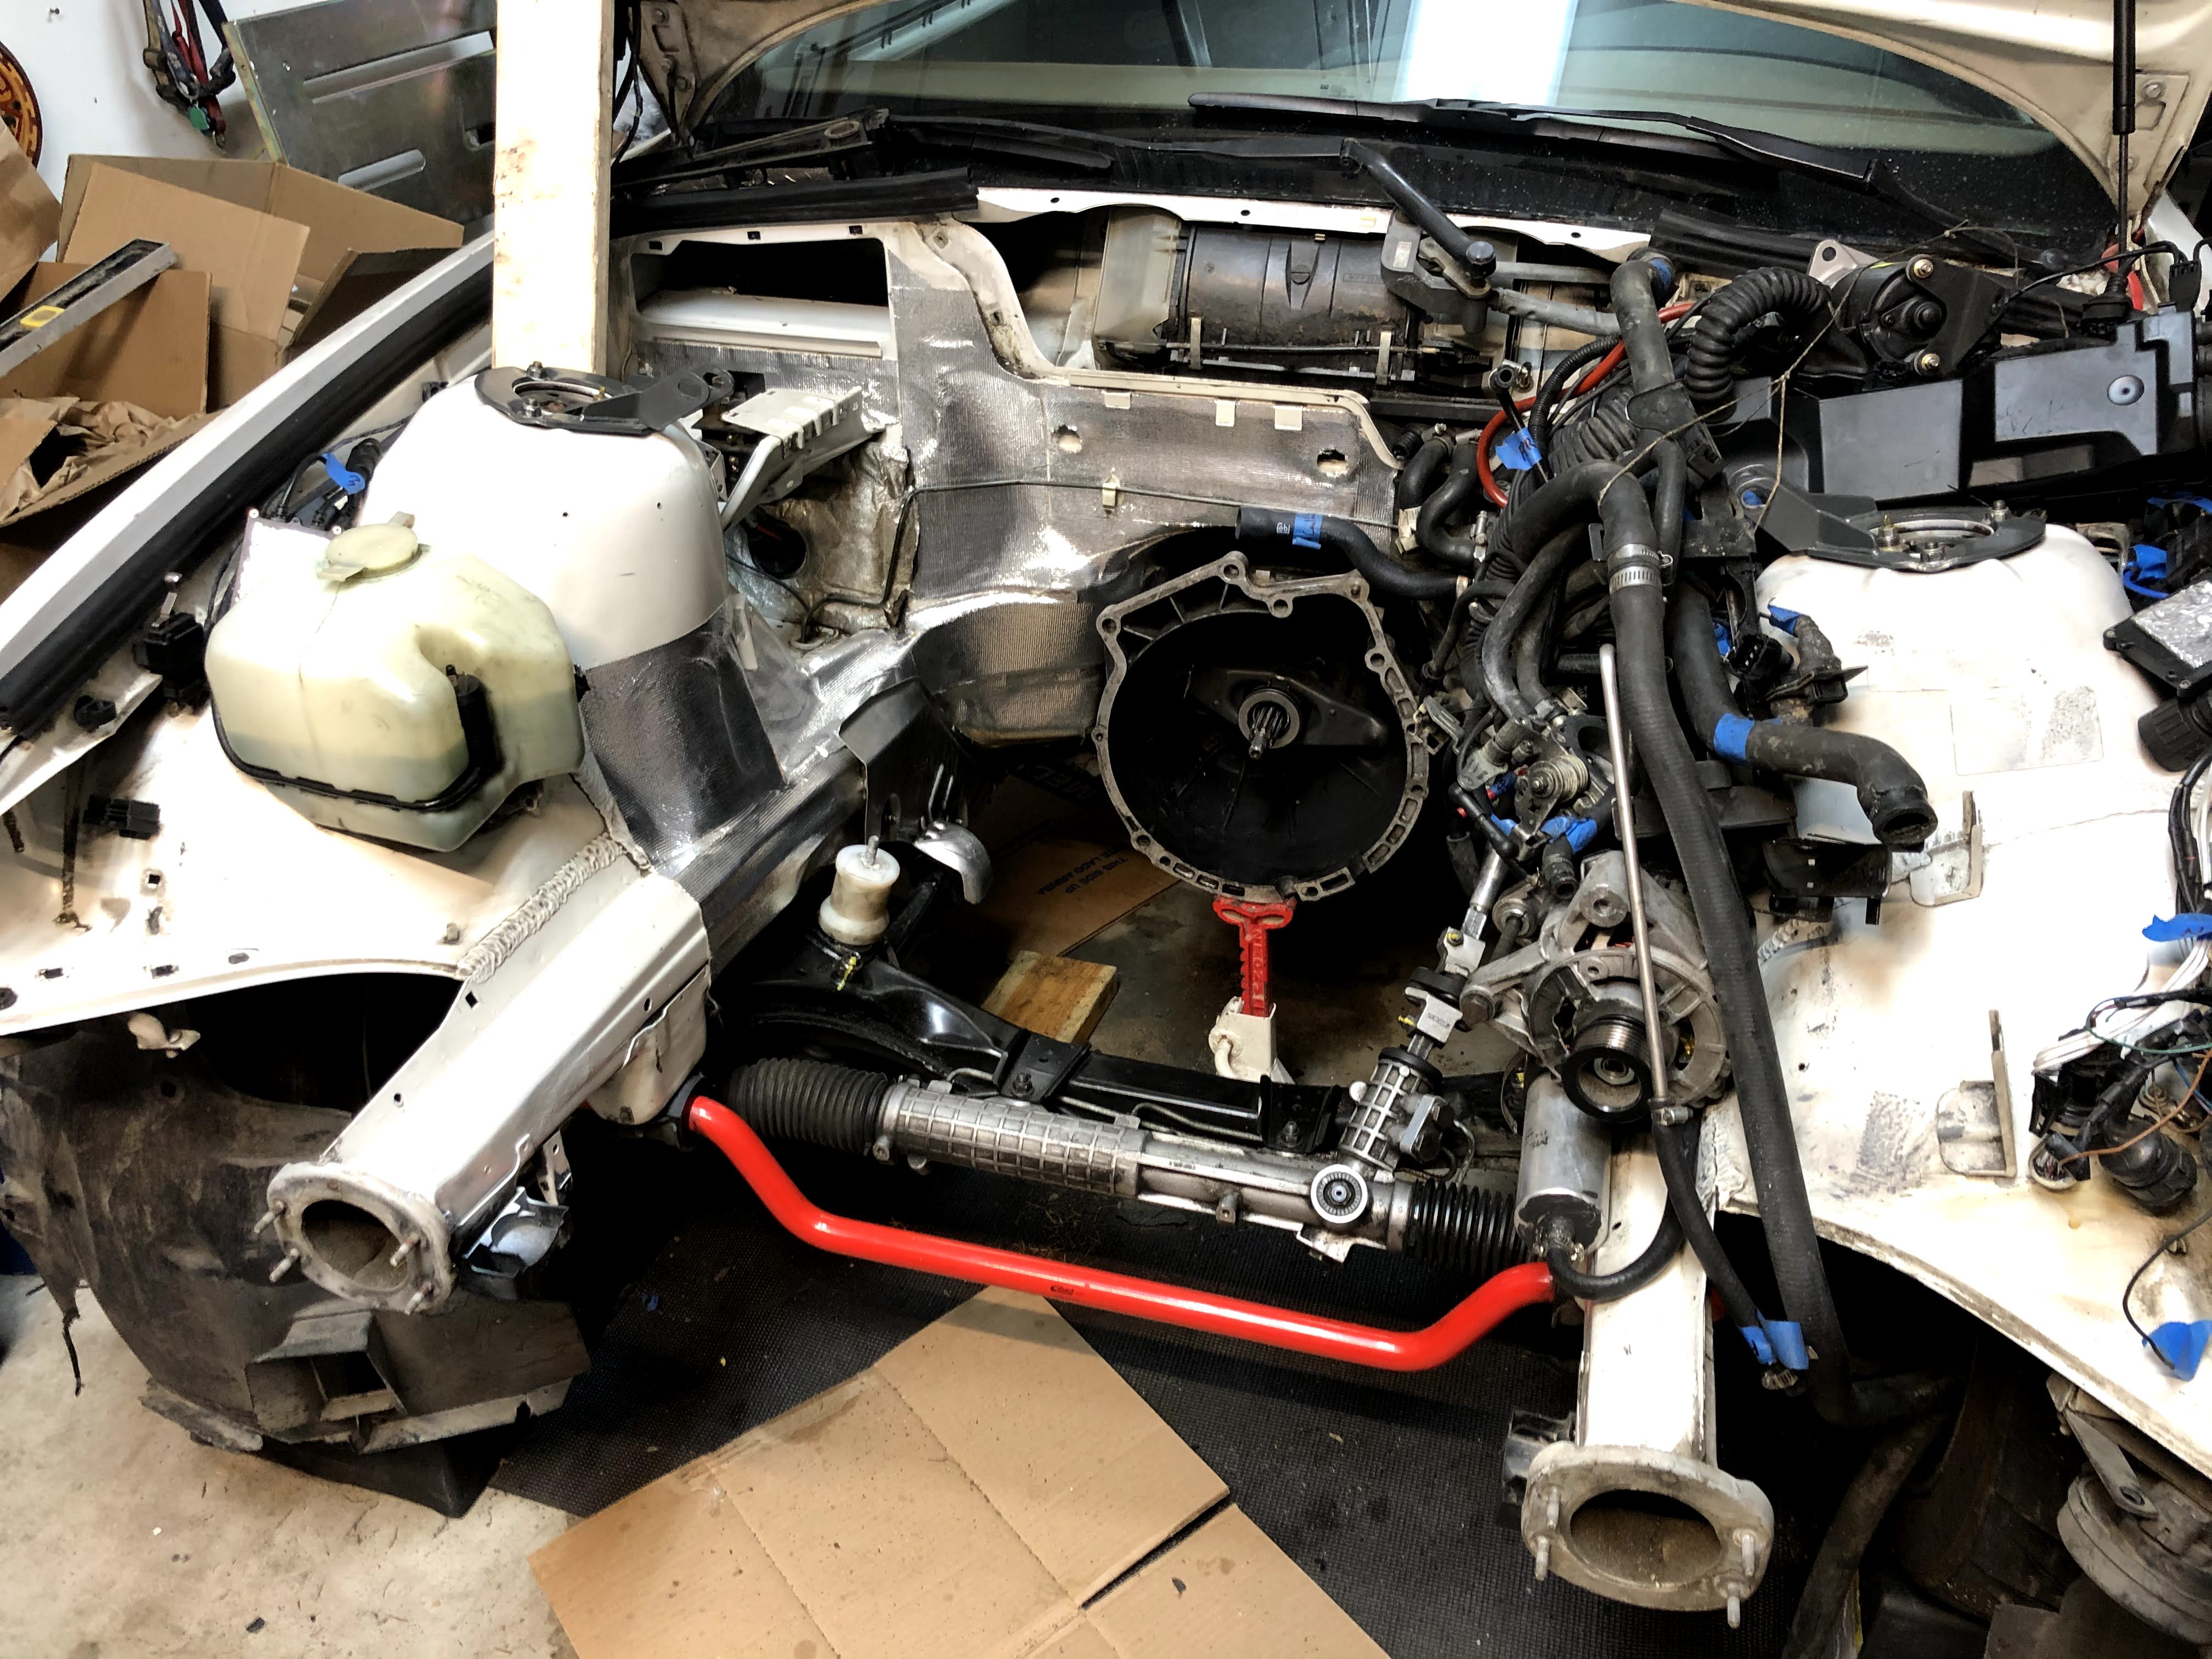
I moved the engine hoist into place with the S52 attached via chains. I ended up temporarily removing the black plastic / metal splash shield that’s attached to the firewall (and hides the blower motor). It allows the motor to drop into place easier. The really big pain is trying to get the transmission input shaft to slide into place through the clutch and into the pilot bearing. What a pain!
I just had to keep jiggling the engine and rotating the crankshaft until it finally slipped into place. Reinstalling all the bolts that mate the engine to transmission bell housing was the next step.

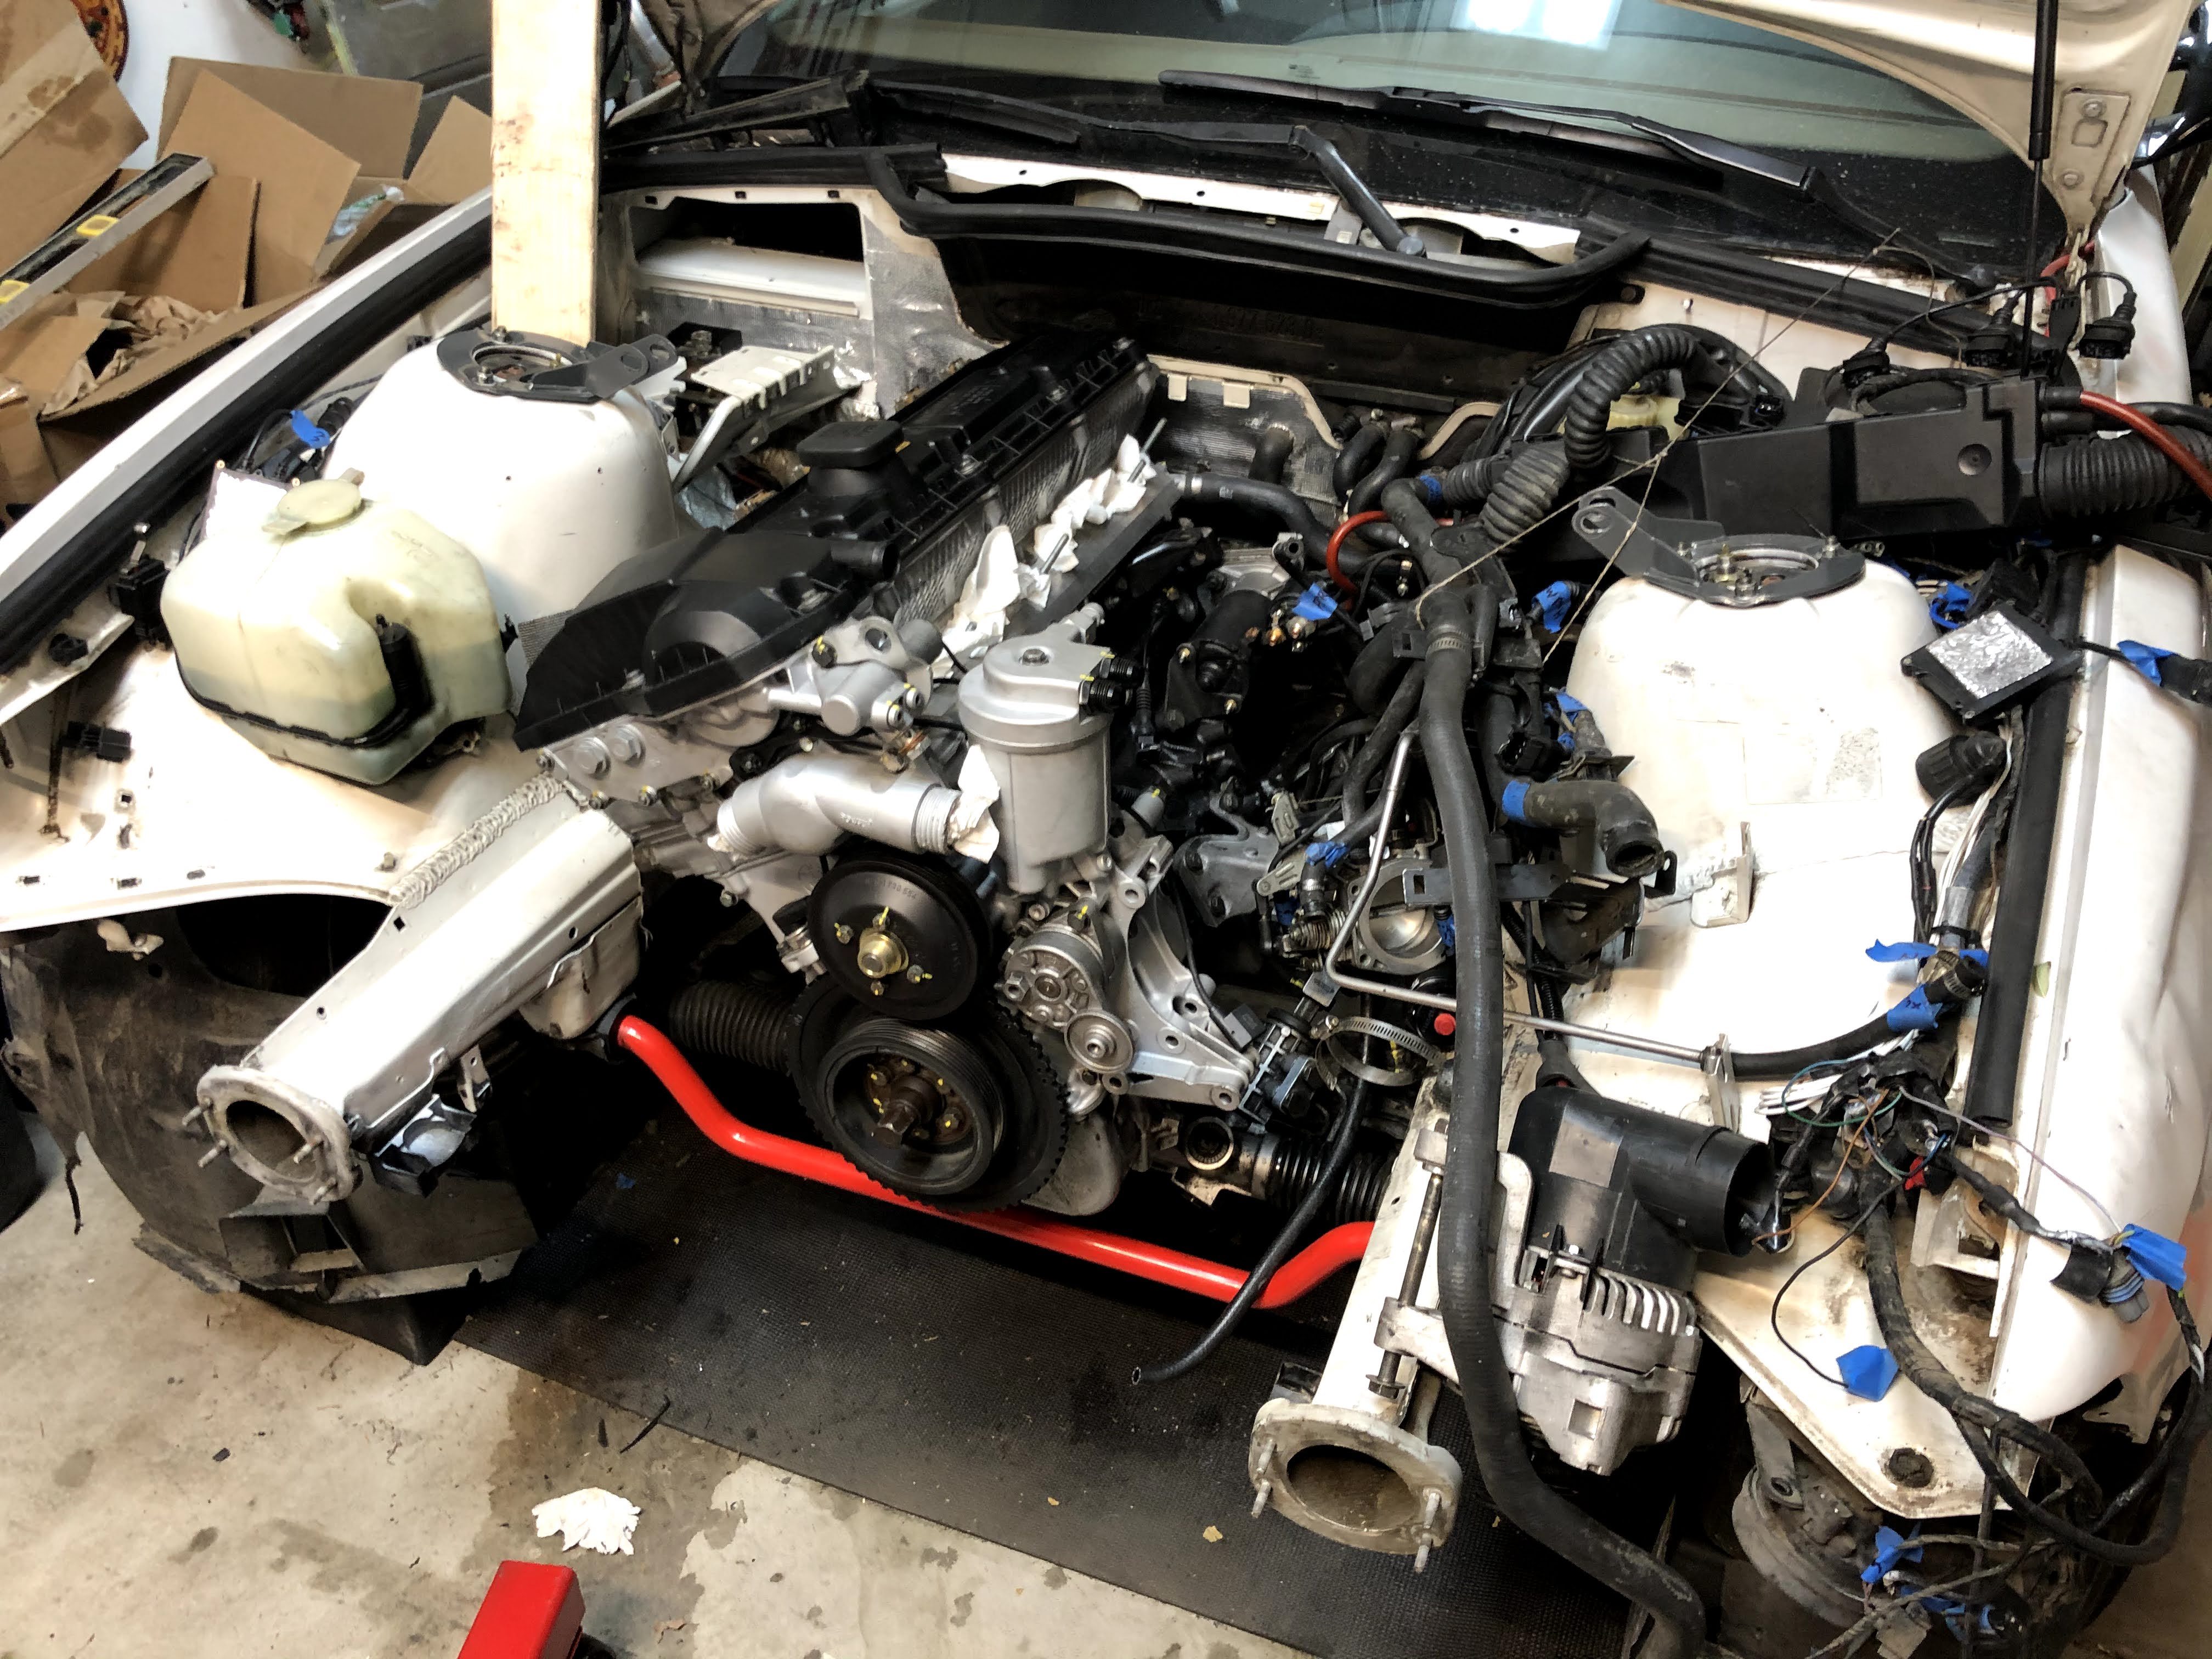
Here’s a view of the front of the engine once bolted in place and sitting on the engine mounts.
It was then time to start hooking up all the various sensor connections. Luckily I made sure to clearly mark what goes where when I was initially removing the M50 engine. Highly recommended to be thorough with that!

The intake manifold went on next. The toughest part with this step was connecting the Idle Control Valve (ICV) rubber tube to the bottom of the intake manifold.

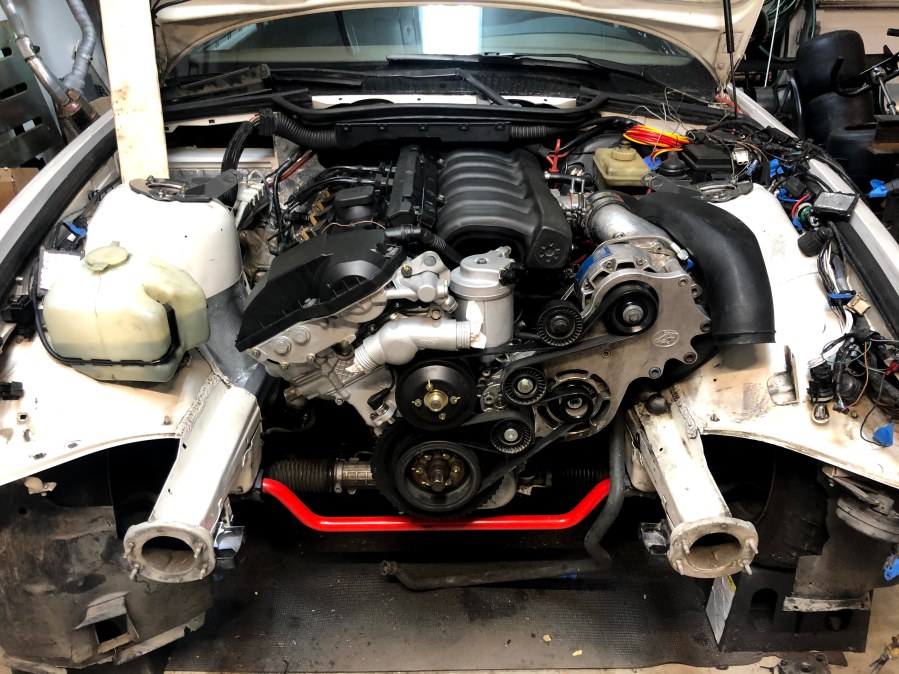
Time to get the Vortech V2 supercharger setup bolted into place. It went on nice and smooth with the whole front end of the car removed!

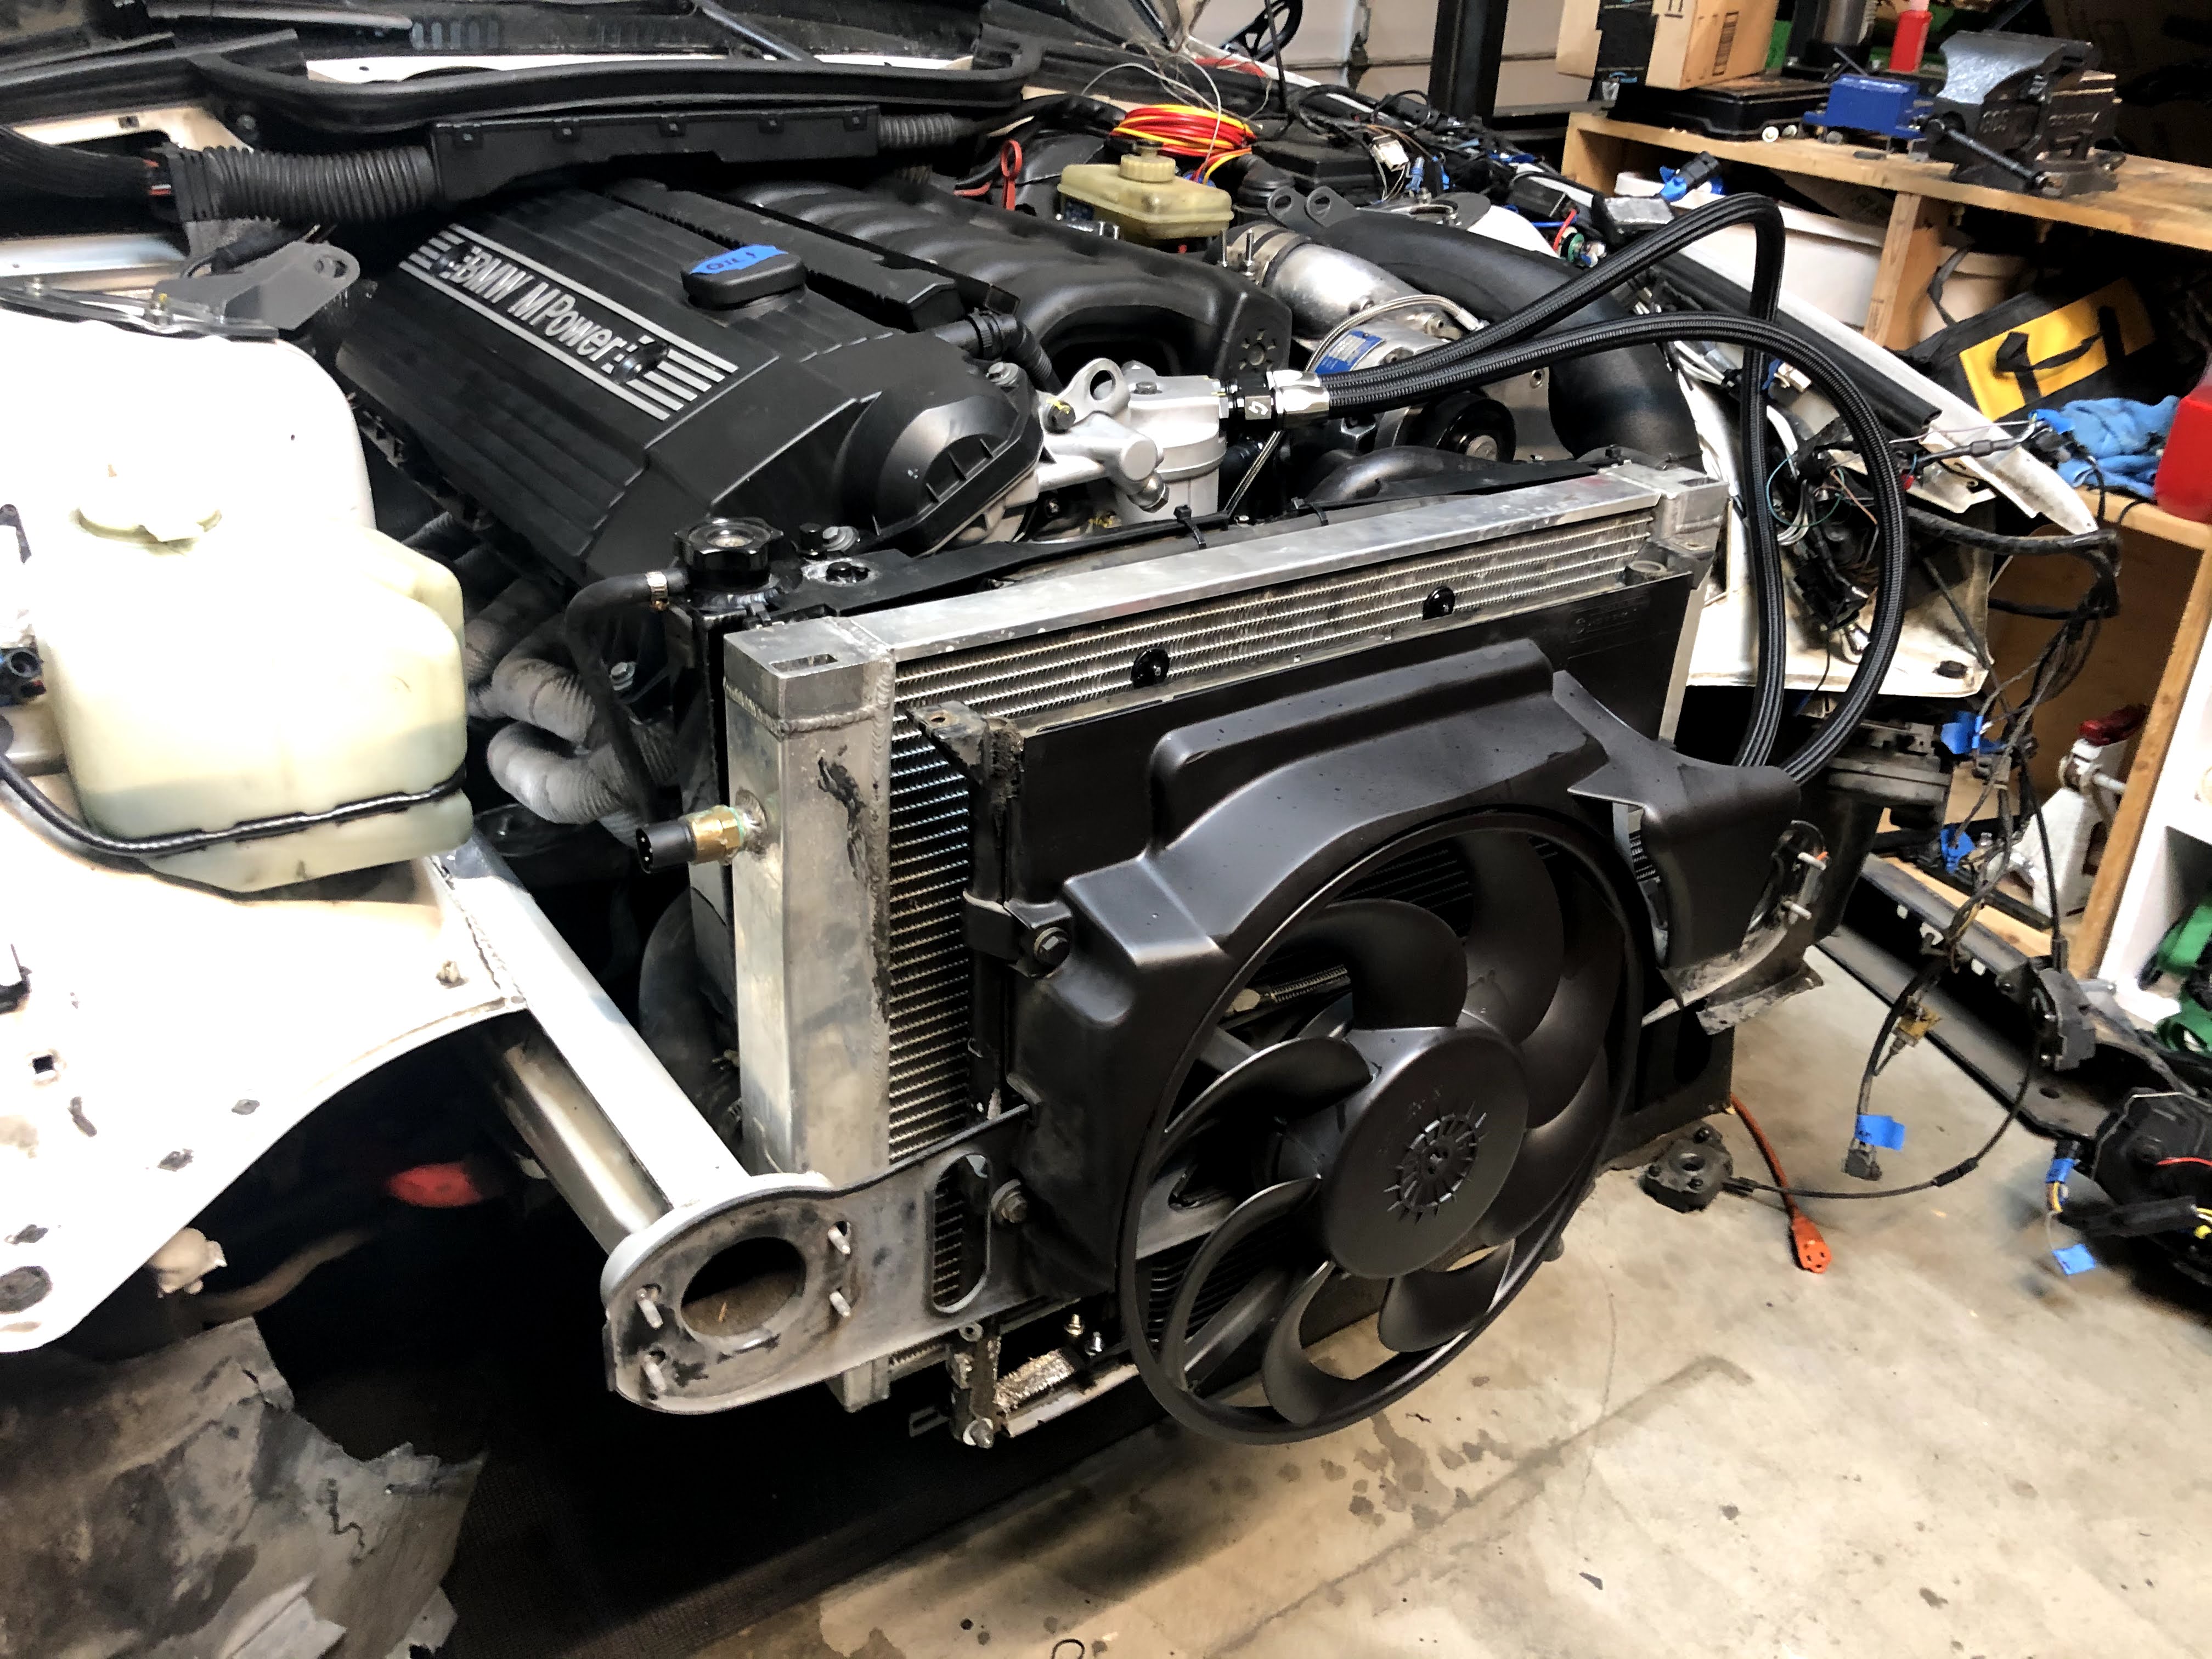
Another view of the front of the engine with the supercharger installed.

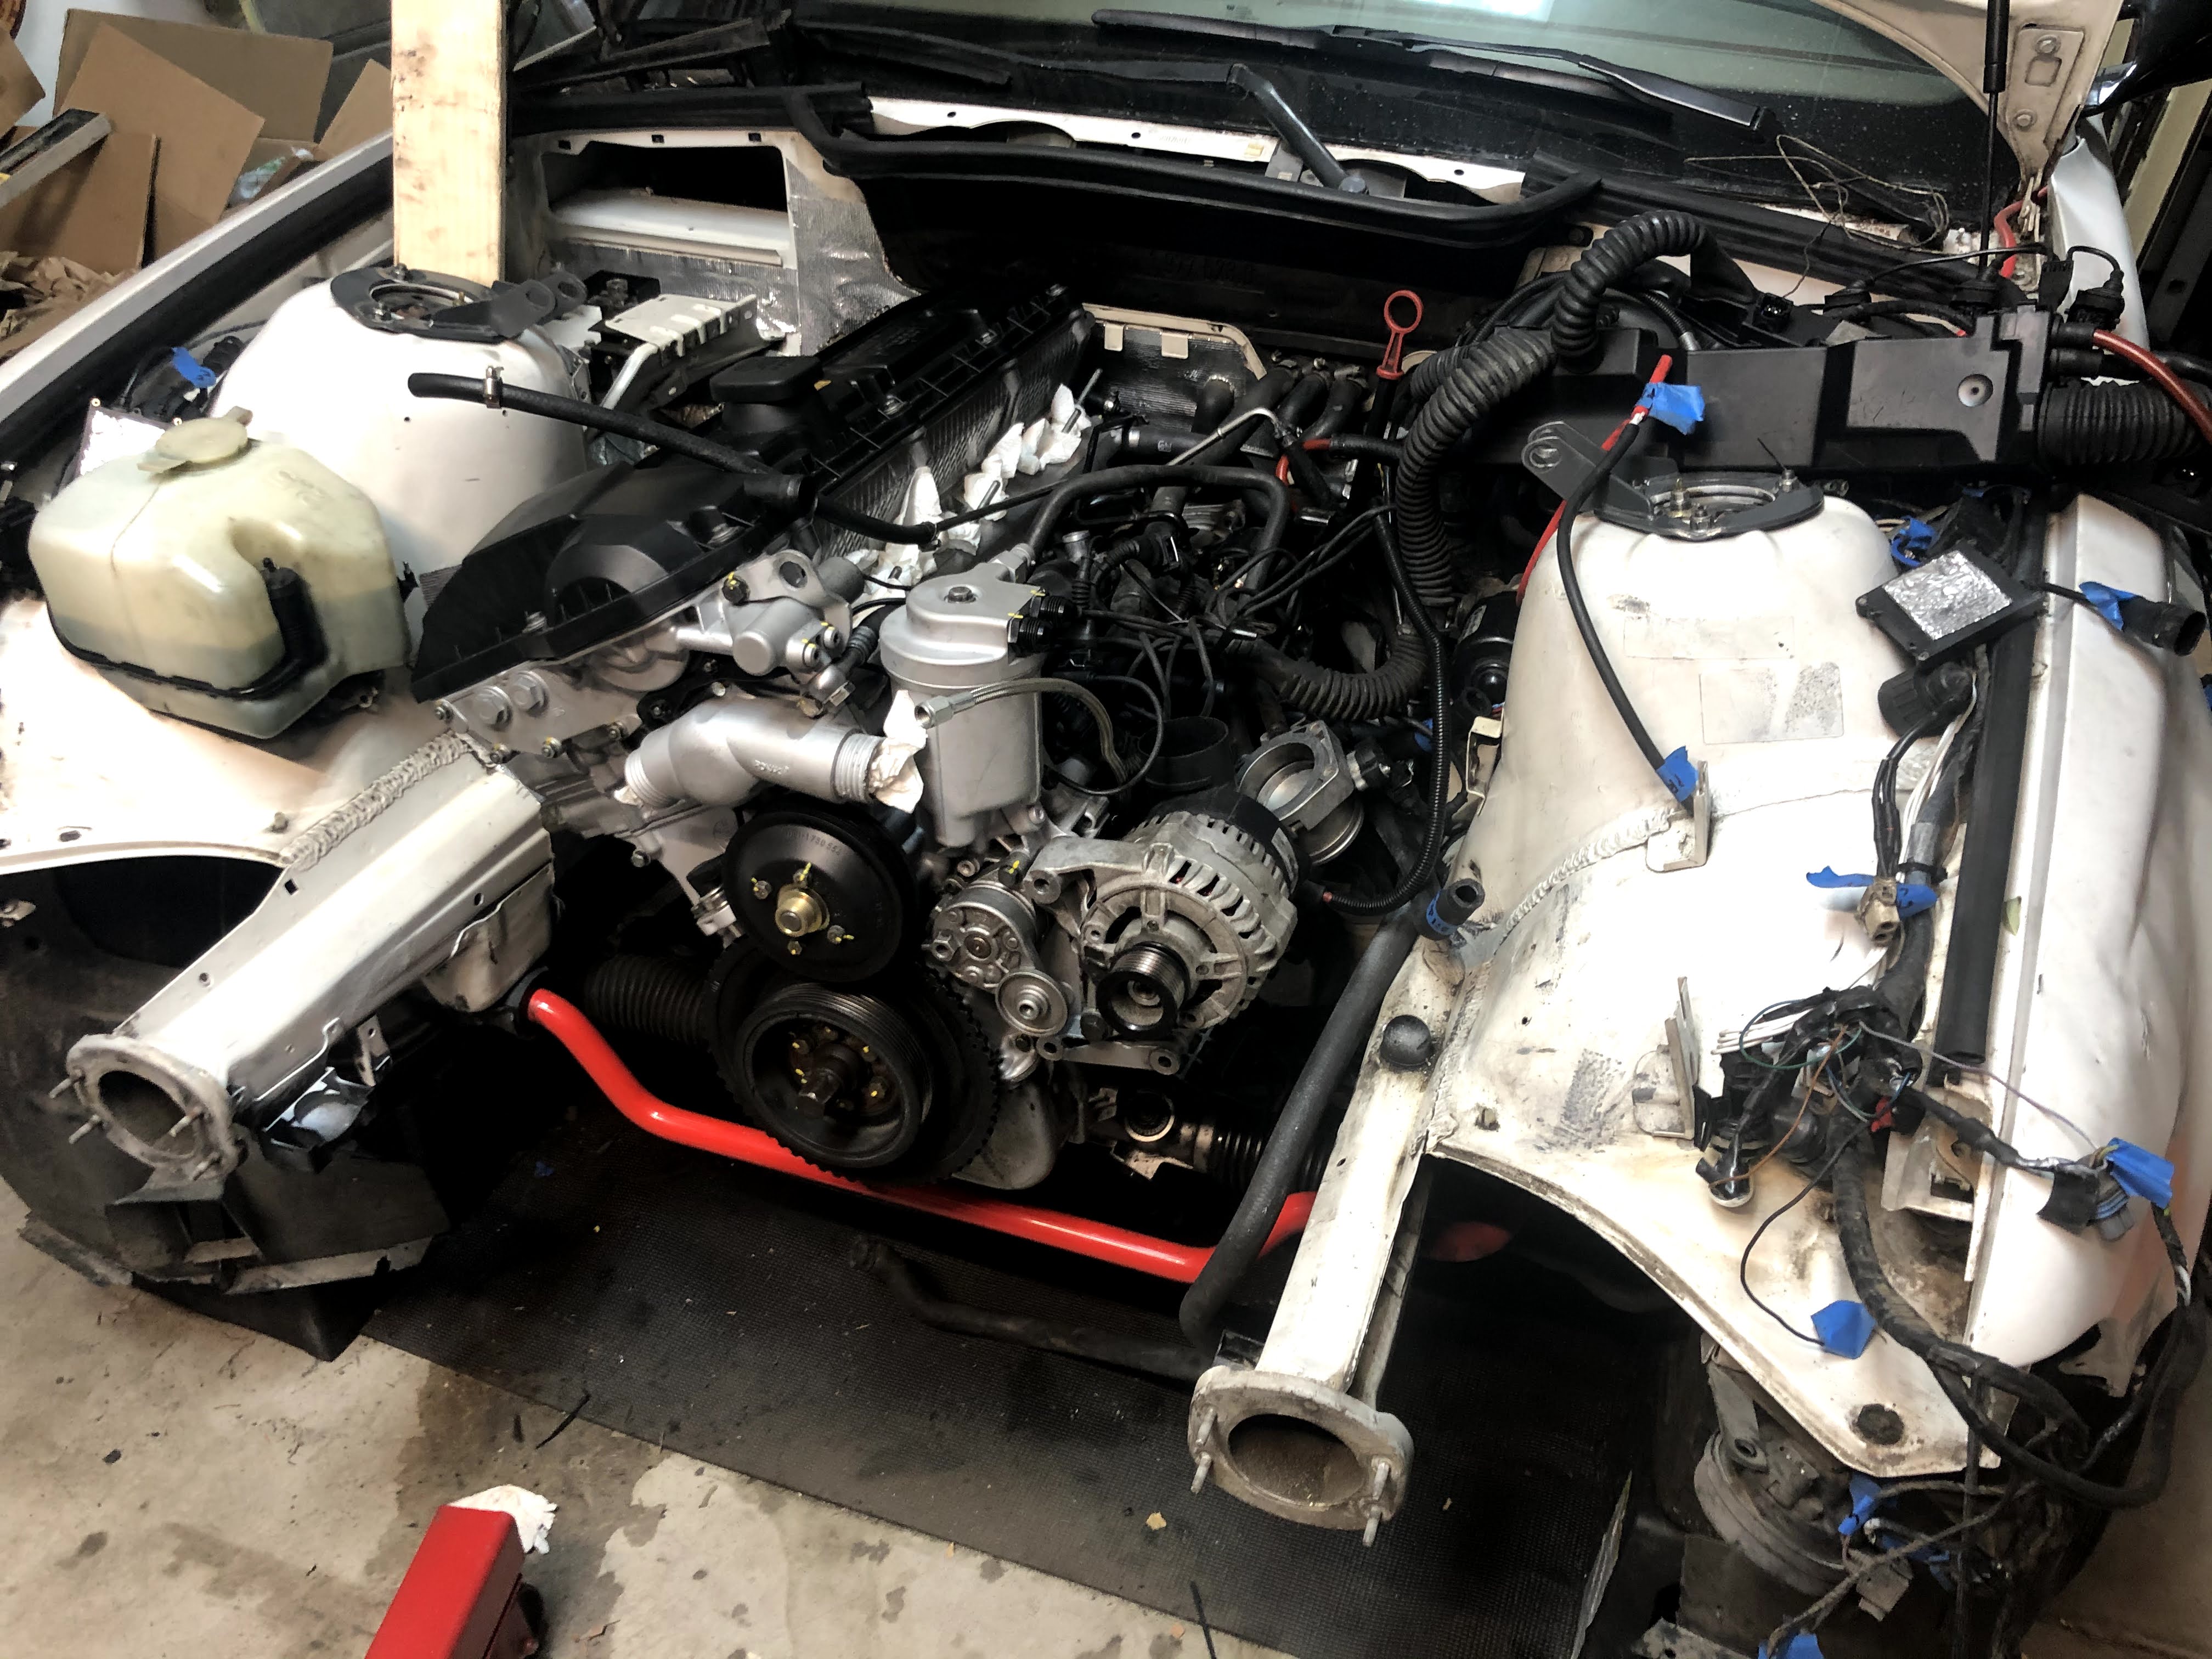
And another view…

And one final view of the engine in place.

With the engine now producing a lot more heat, I decided to install a Spal puller fan onto the back of the radiator for use during racing. Since the fan will be installed between the radiator and front of the engine, it needed to be low profile.
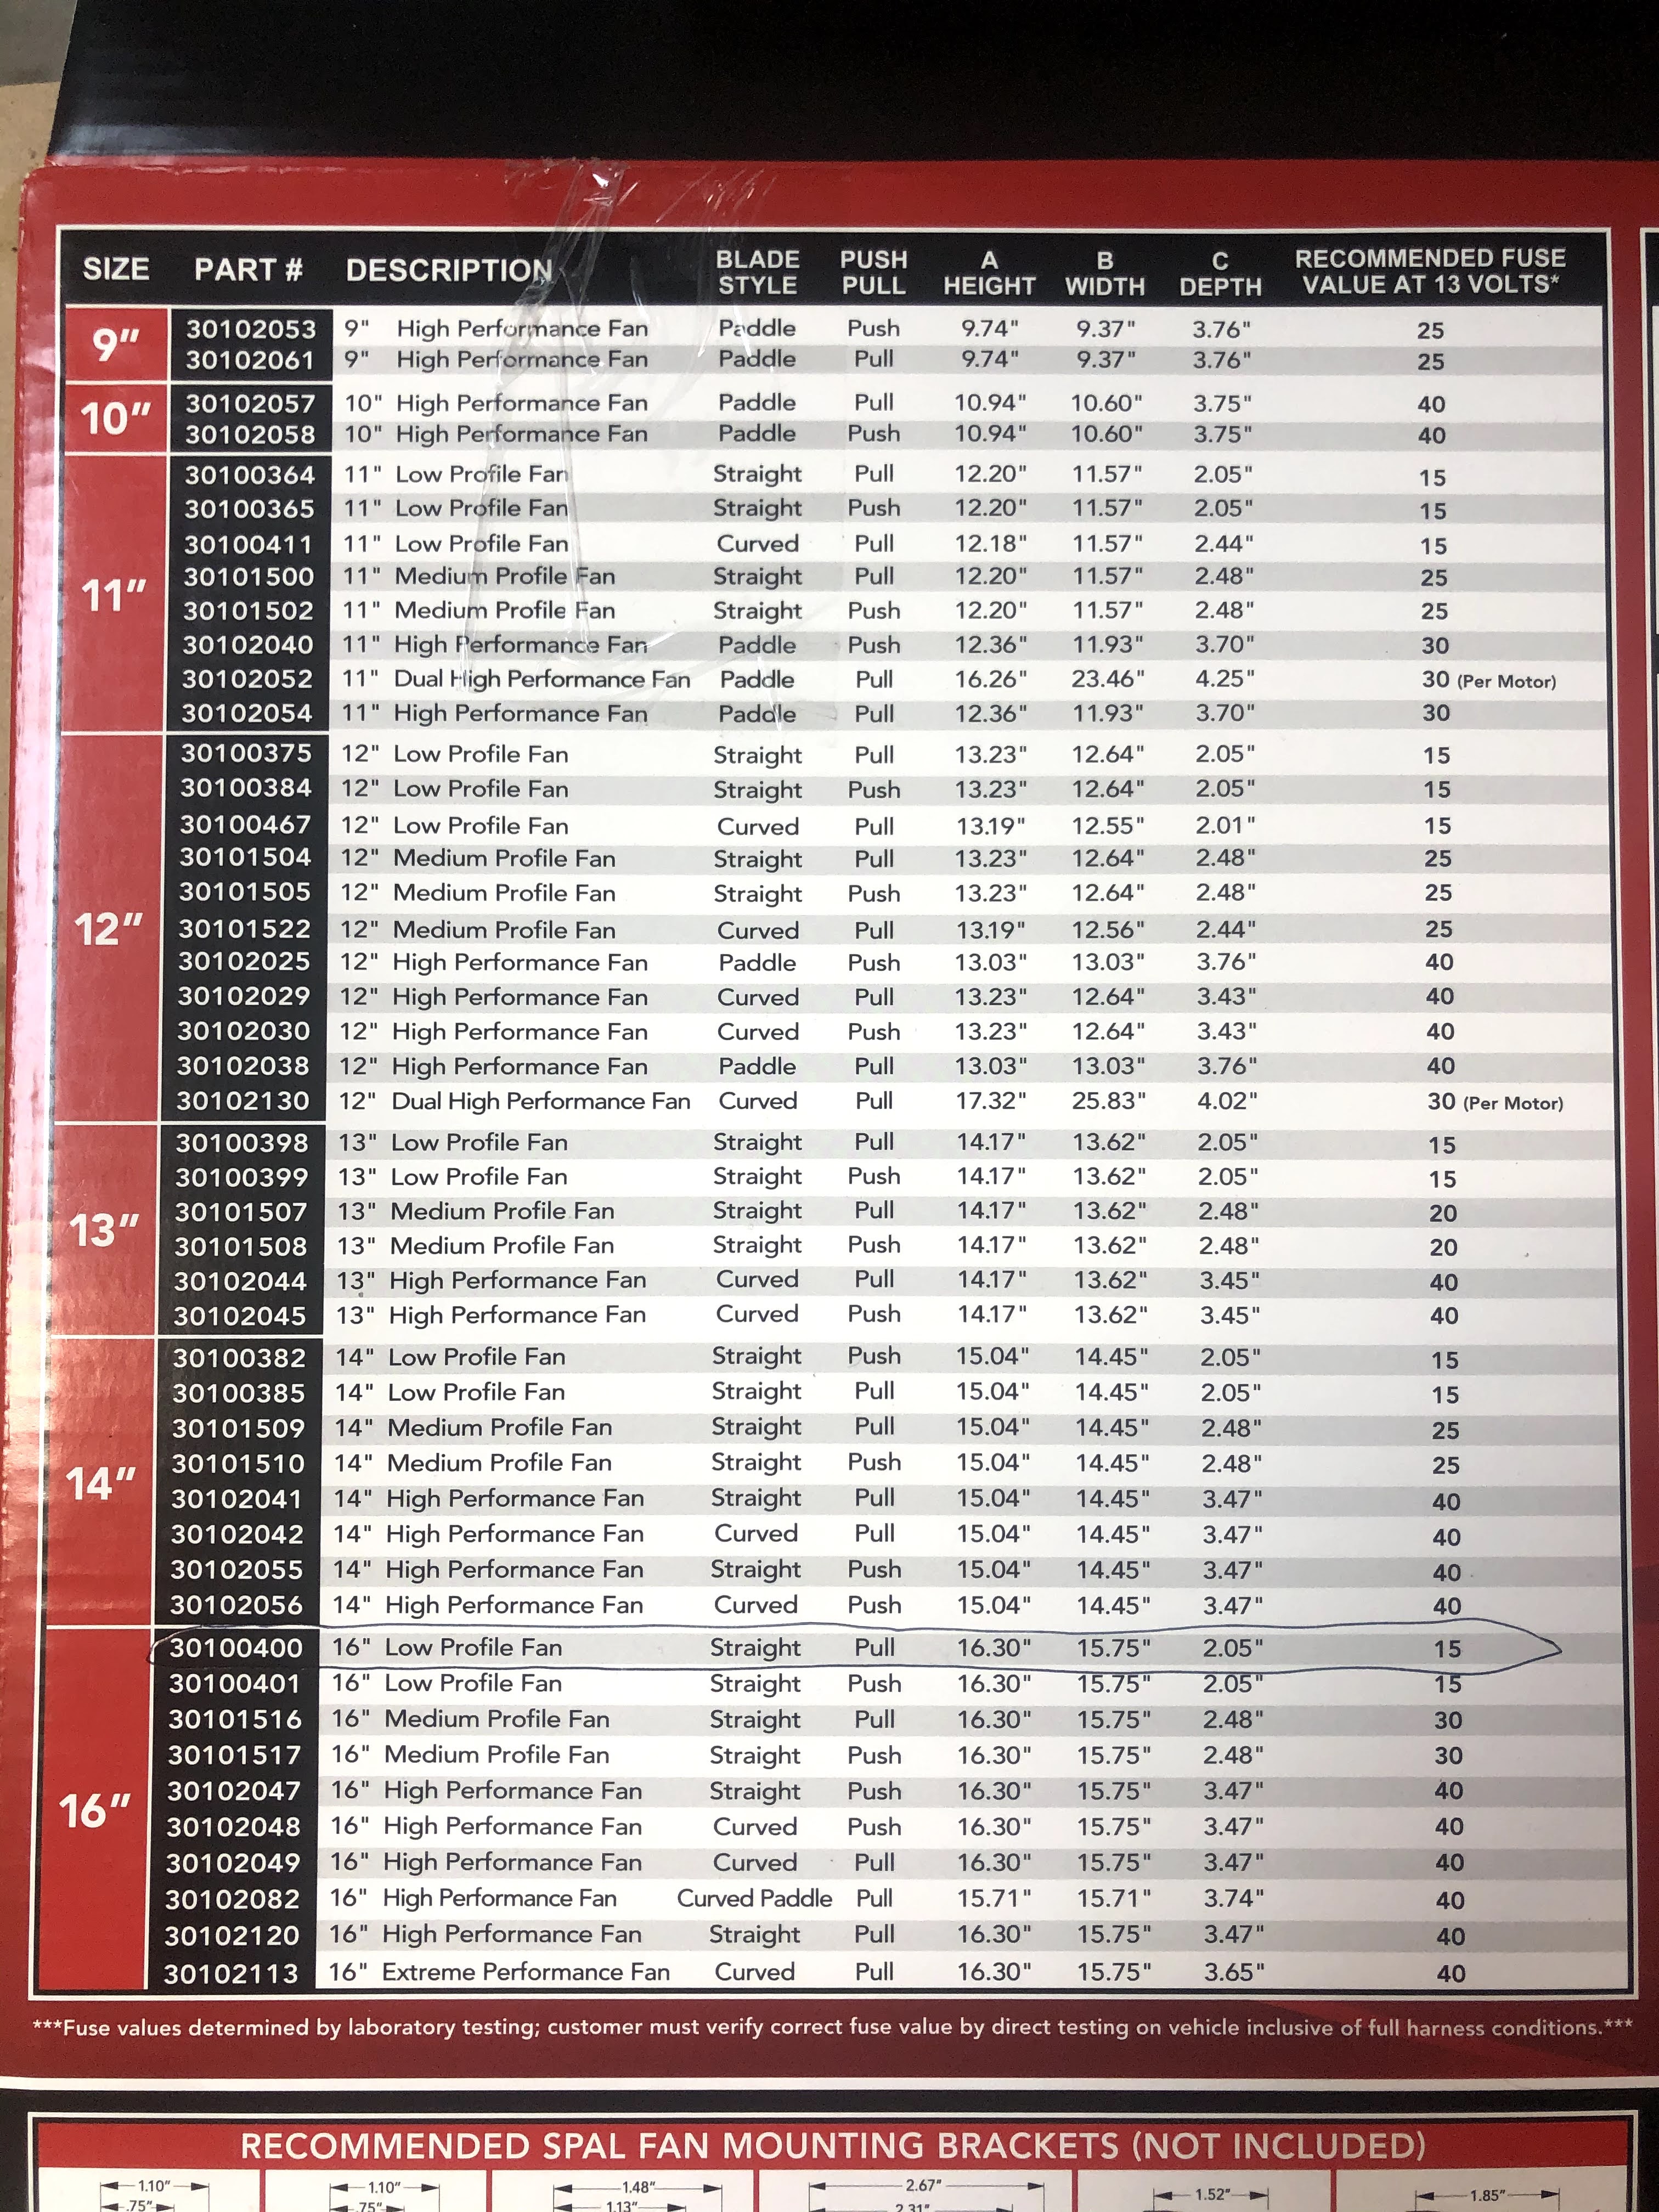
I decided to go with a relatively low CFM 16″ puller fan (only 1074 CFM) as my aftermarket aluminum radiator is a pretty big size and shouldn’t need much help to keep up with the increased cooling duties. I’ve circled the Spal 30100400 fan specs that I ended up choosing.

The fan fits really well on the radiator. I also used the Spal rubber fan shroud gasket (~0.5″ thick) to isolate the fan from the radiator.

I researched a few different ways to mount the fan and ended up selecting some universal push-through type zip-tie like mounting straps. I also purchased some mounting feet that are made for mounting Spal fans.
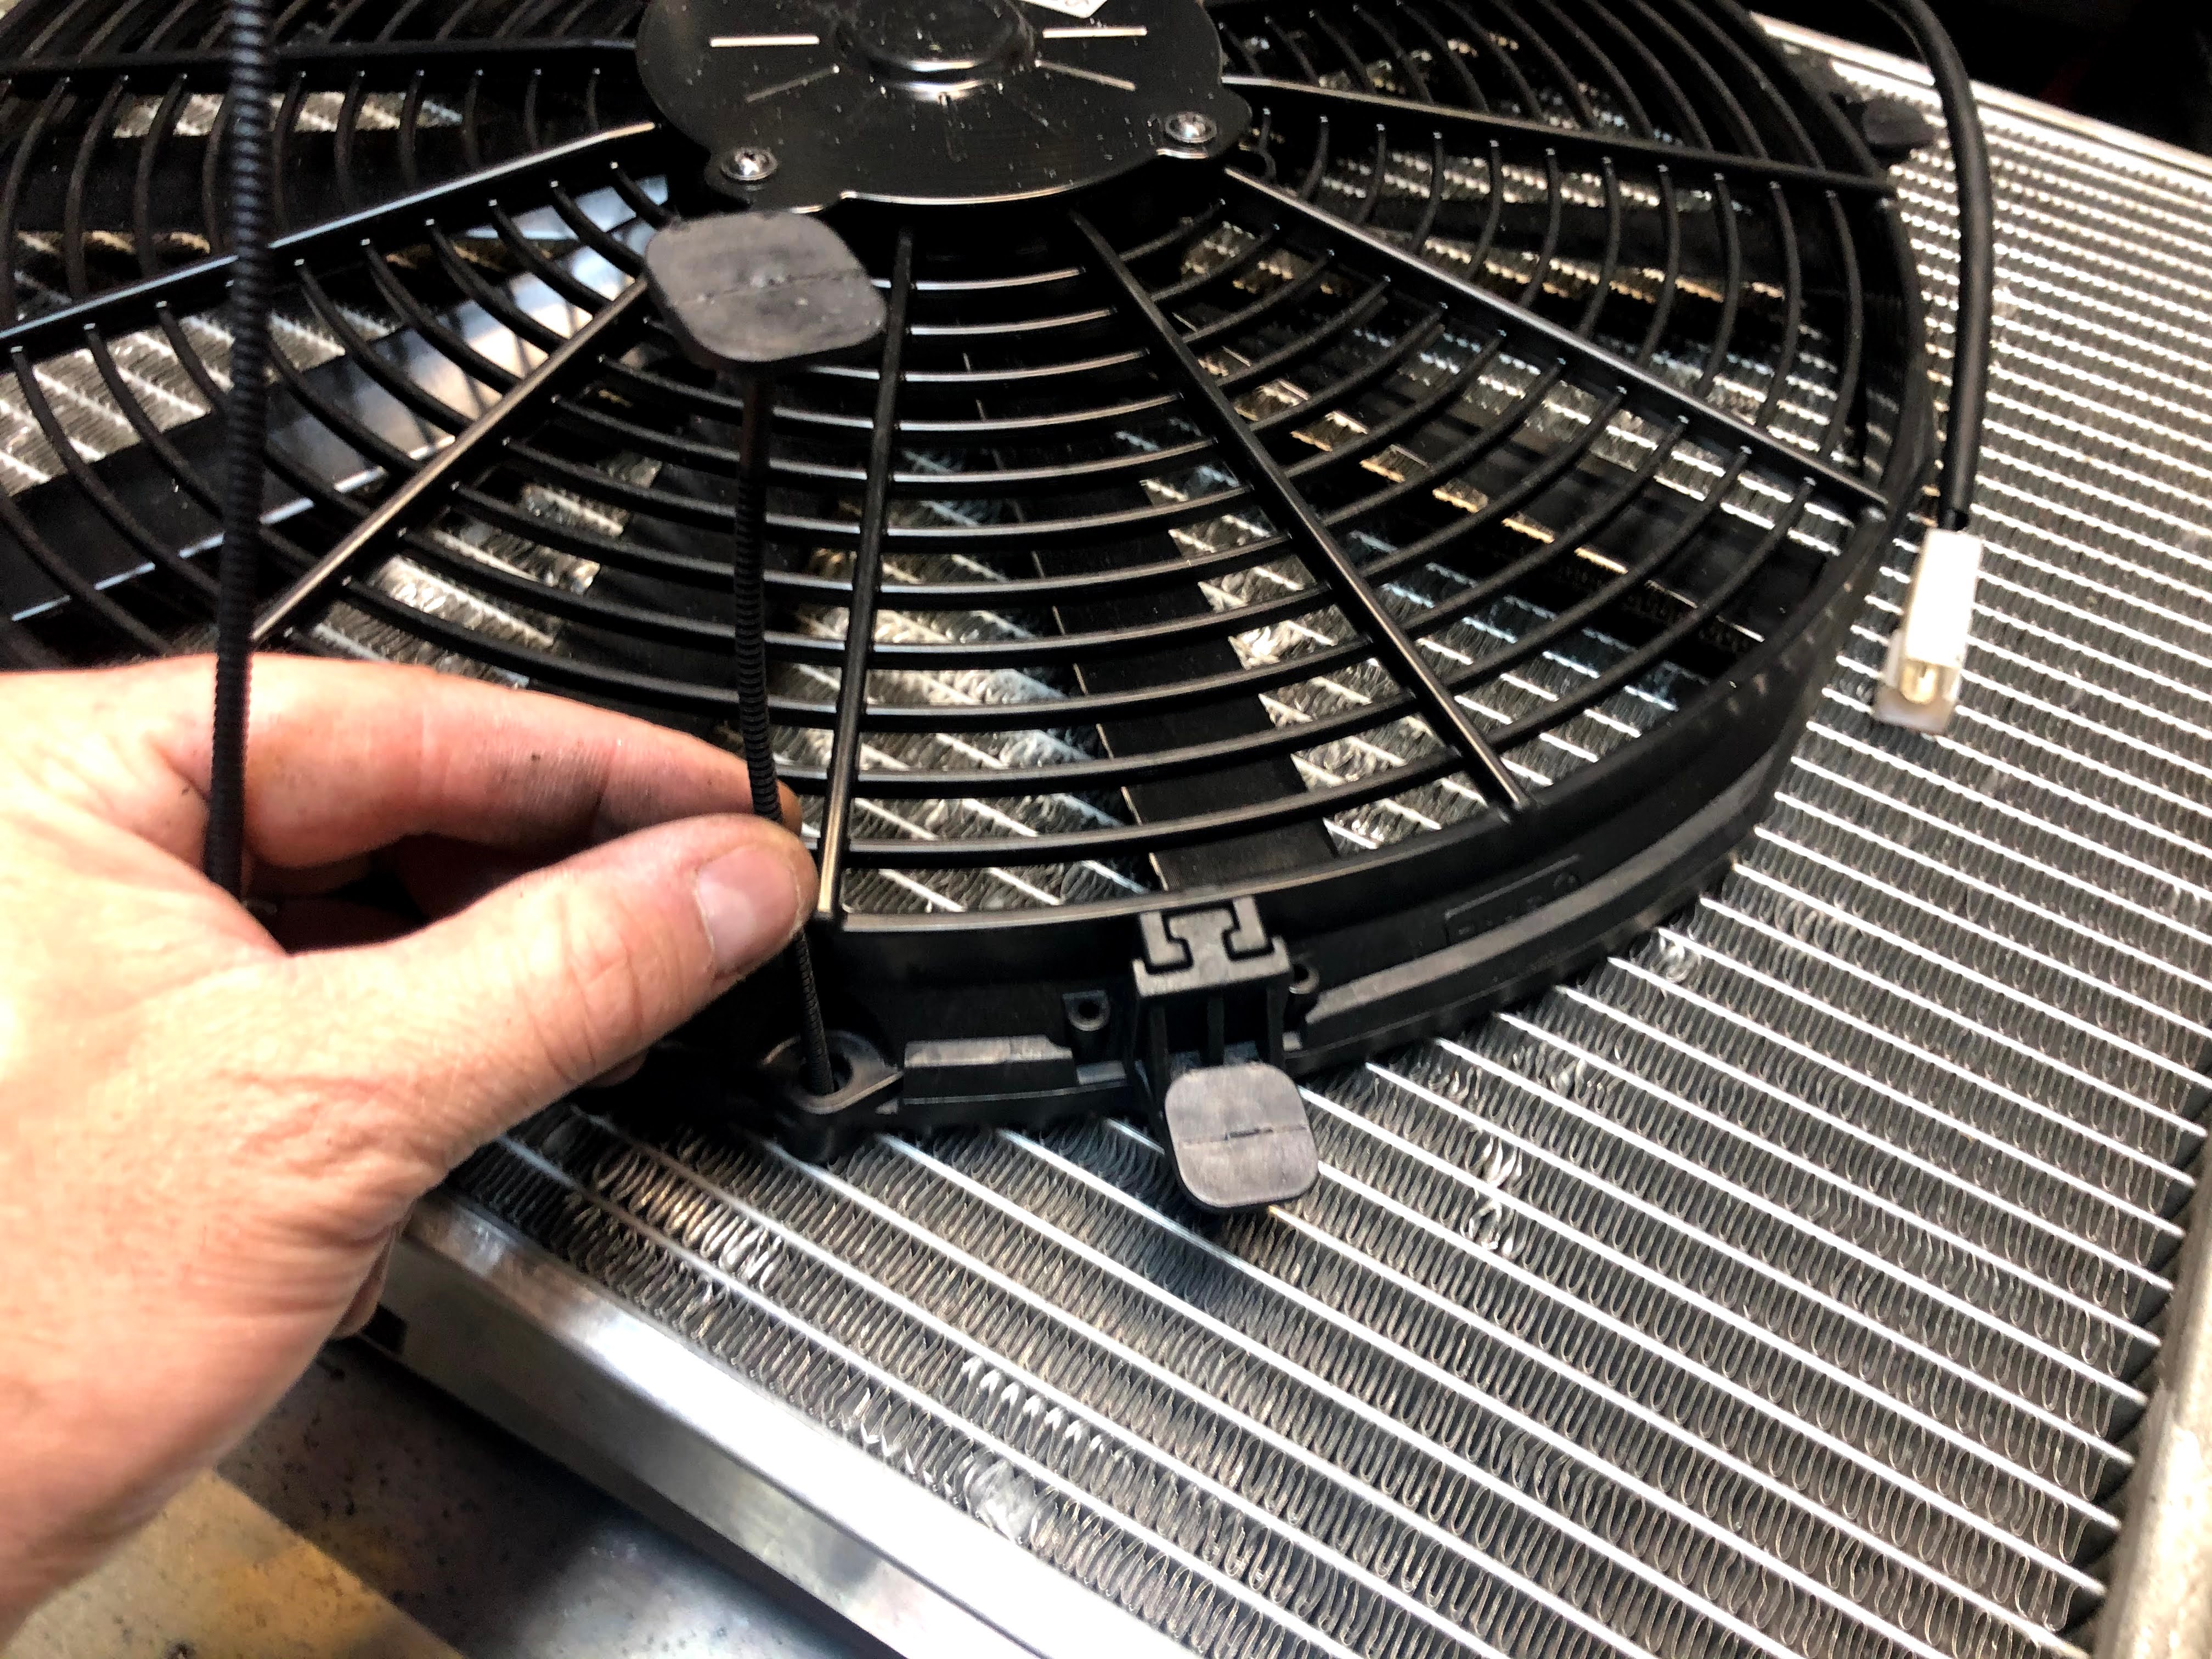
I installed the four mounting feet in place, and also used some existing holes, and was able to utilize eight of the mounting straps.
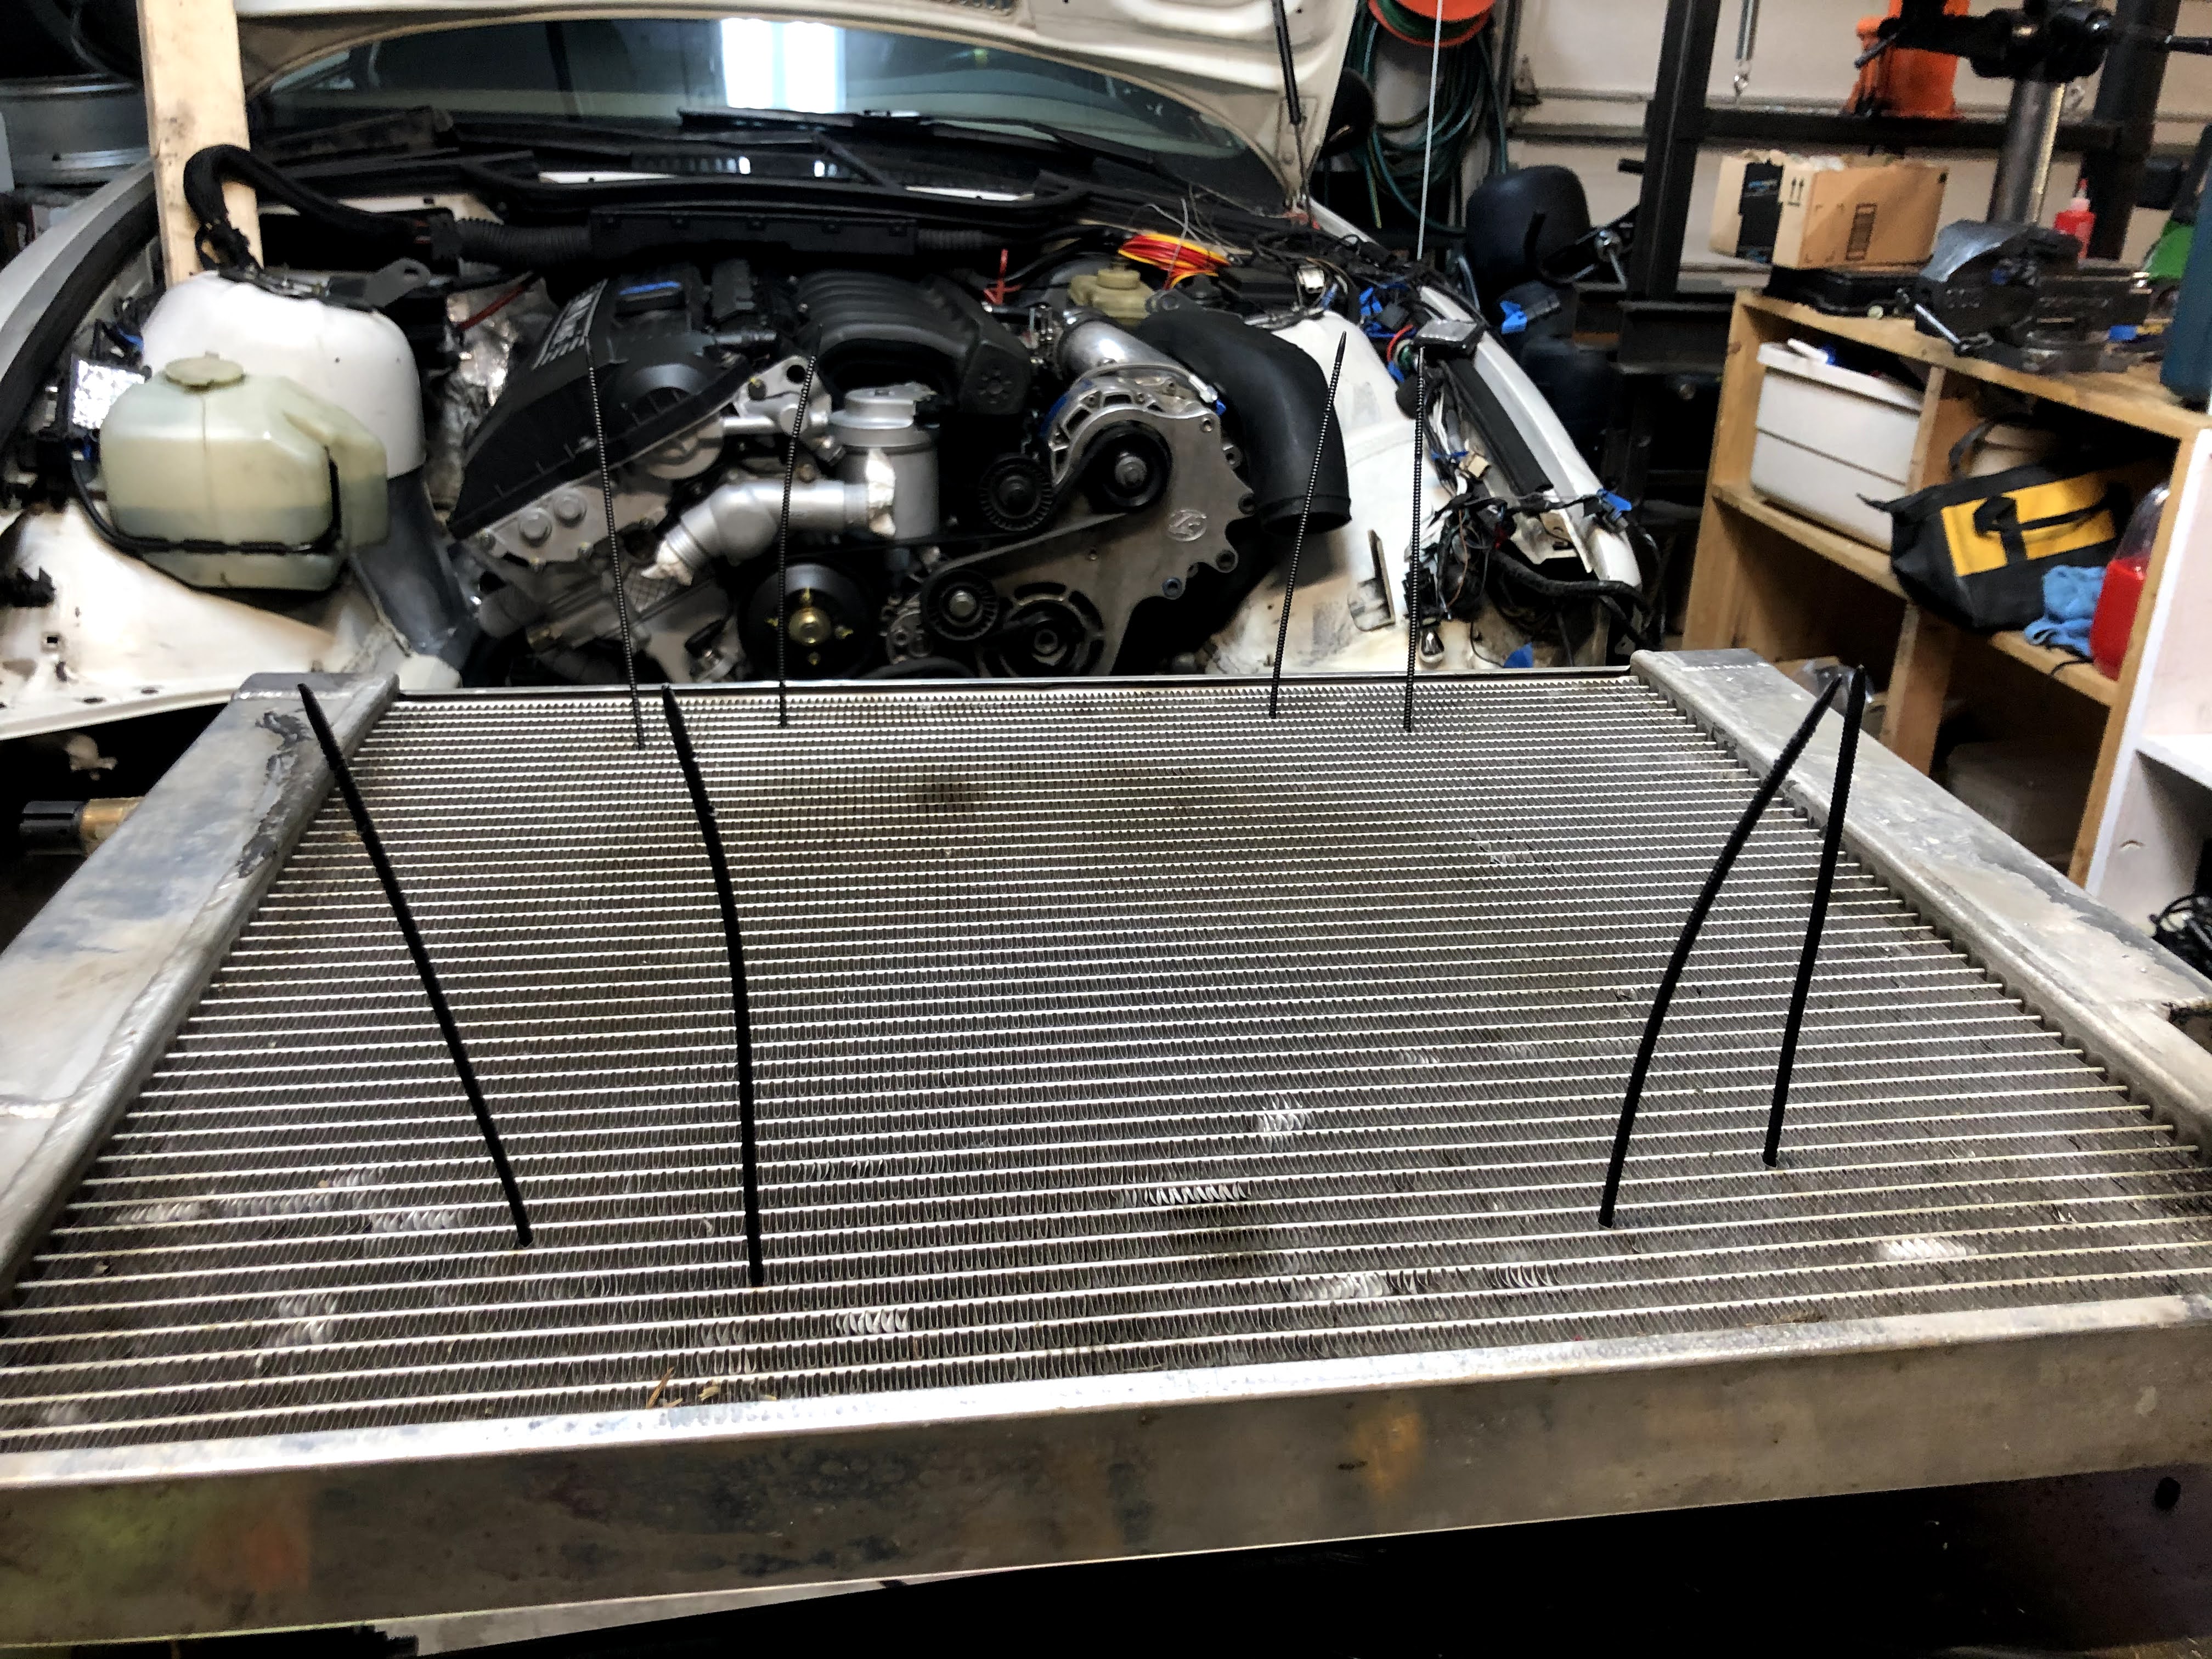
Here’s what you’ll see on the back side of the radiator once the straps are pushed through.

I pushed on the back-side attachment disks and covered them in JB Weld Plastic Bonder to make sure that they never come loose. Just snip the long tails and you’re good to go.

With the radiator sitting in place, everything looked pretty good. The fan felt really secure and should hold up well to racing.

There’s about 3/4″ of space between the nose of the water pump and the spal fan motor housing. Plenty of space for my setup but it’s clear that you could only use a slightly thicker puller fan if you wanted to.
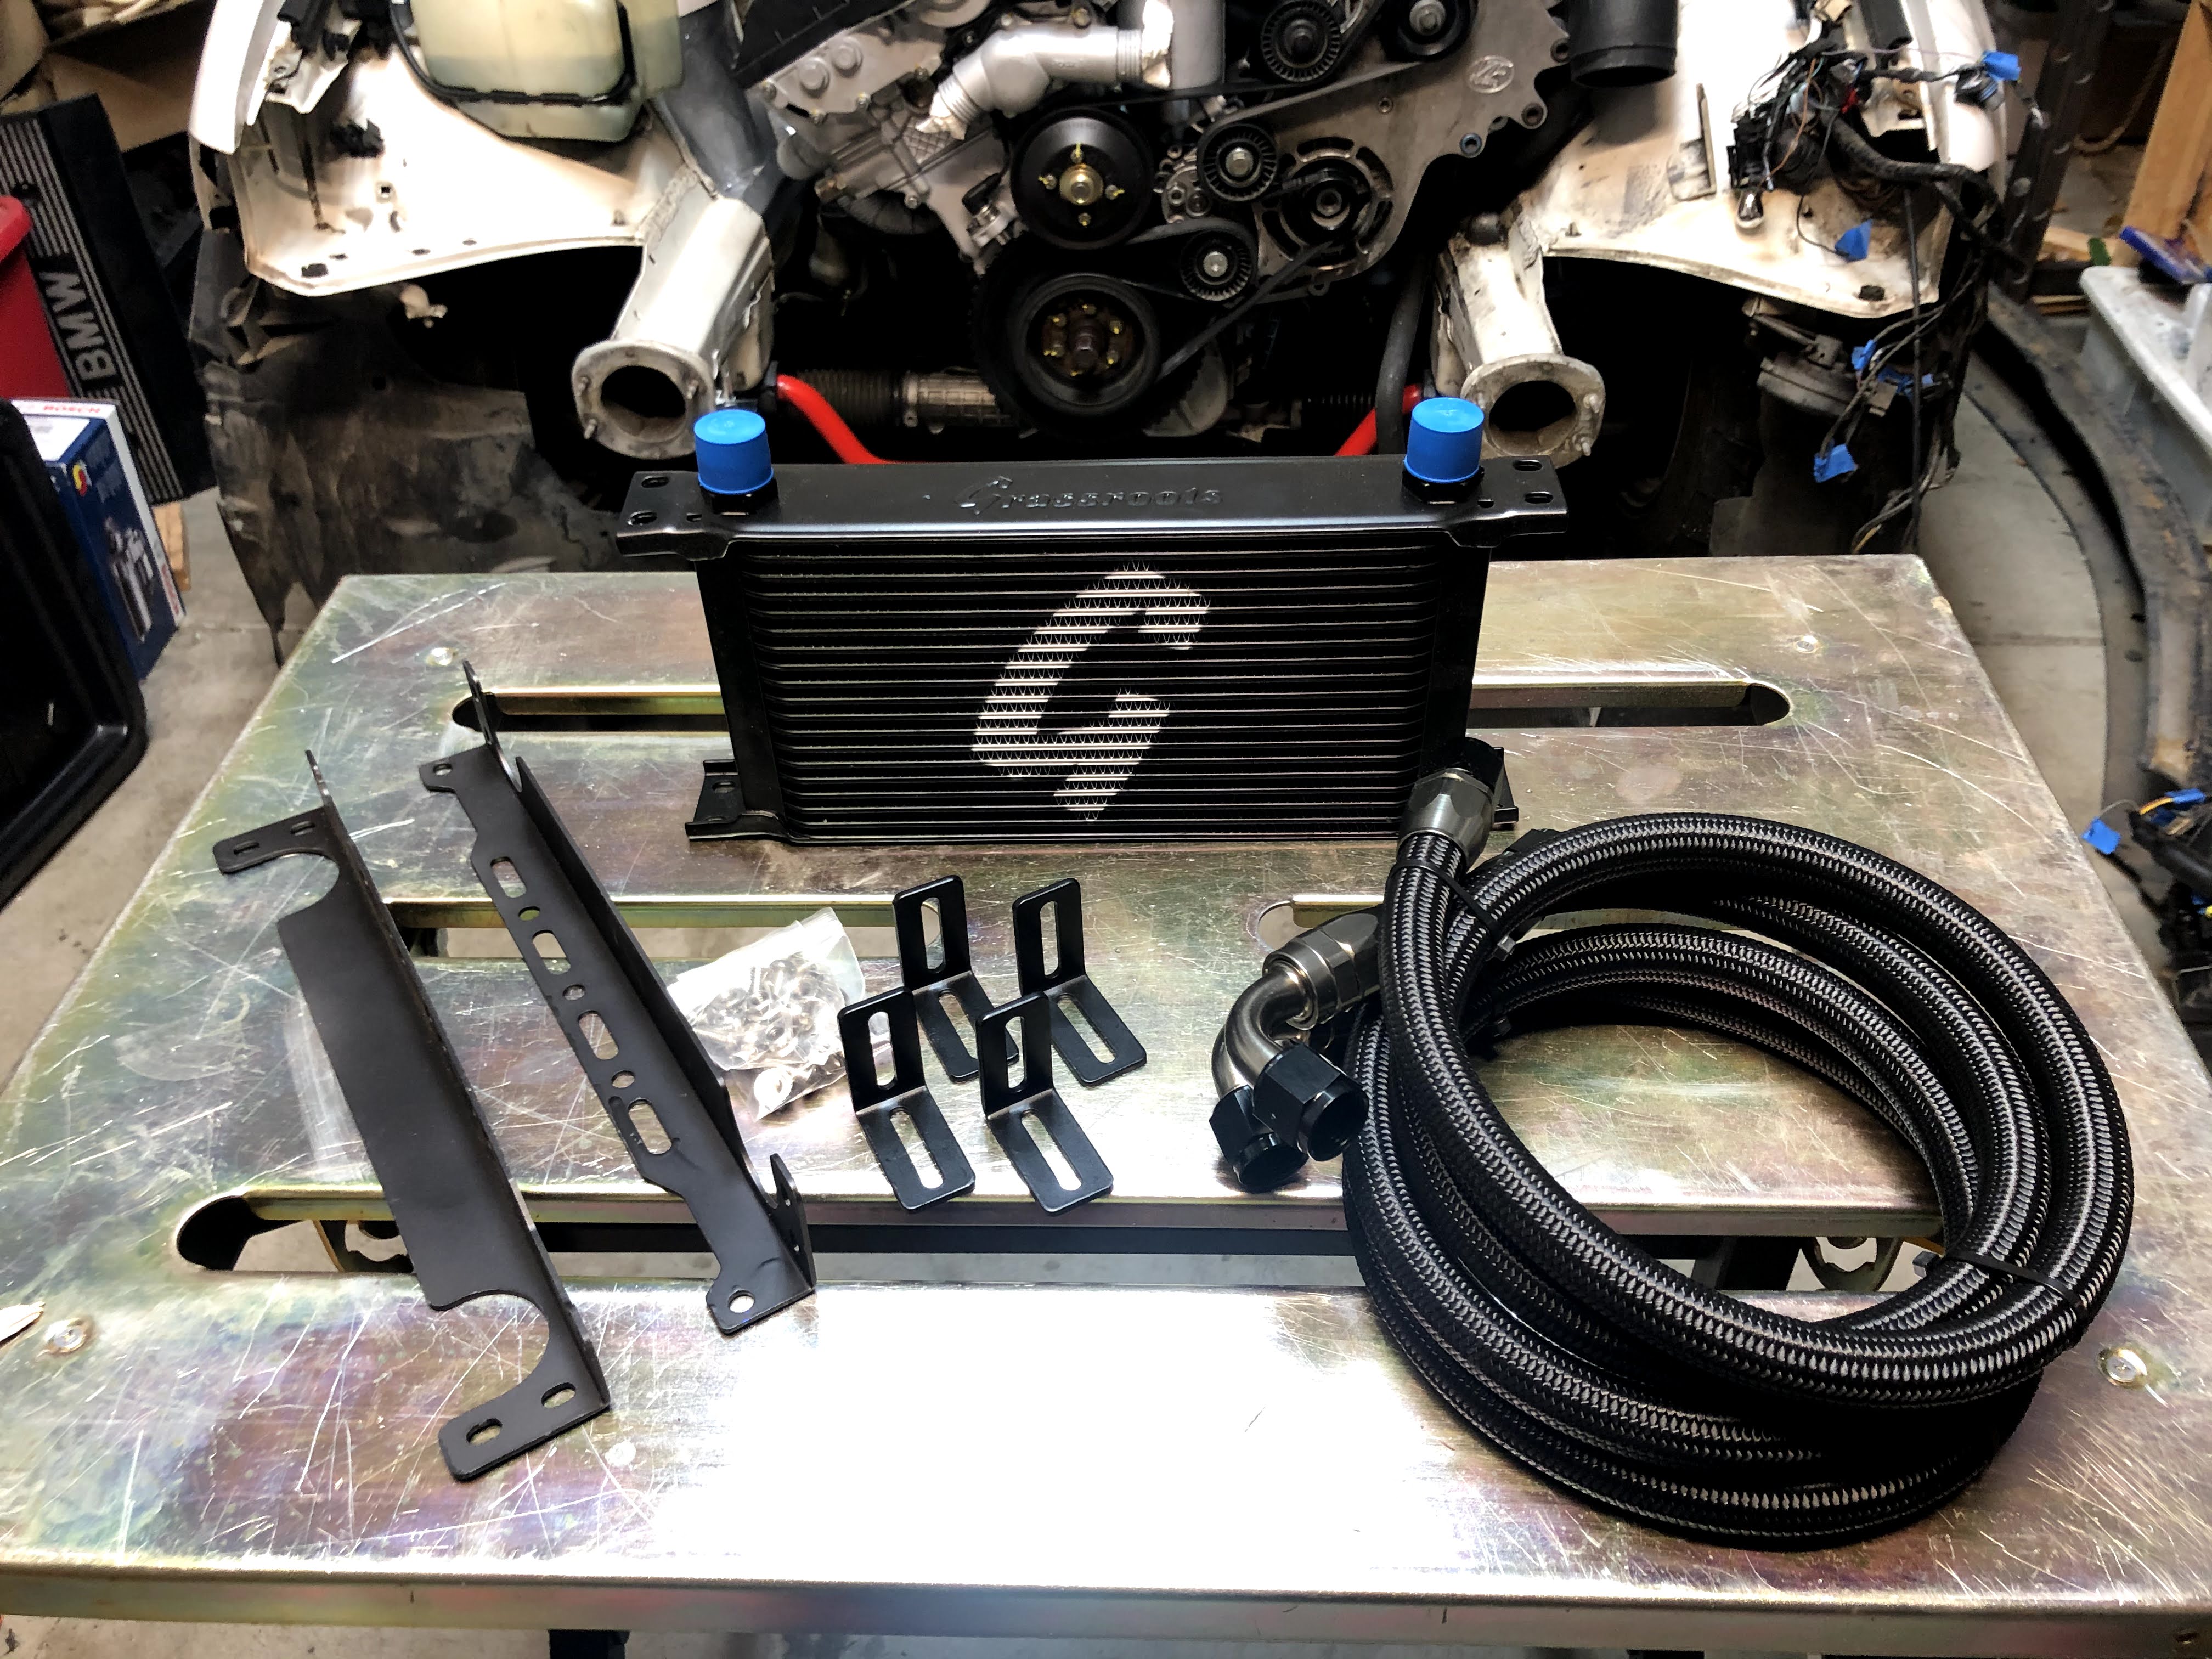
Now that I’d taken care of the radiator coolant cooling, it was time to focus on the oil cooler setup. If you remember, I’ve got a Rally Road oil cooler cap on my oil filter housing. It’s plumbed for -10AN lines. After a good bit of research, I chose the Grassroots Performance universal 19 row oil cooler setup. I was very impressed on my initial unboxing and it looks very high quality. I actually purchased the mounts and brackets very cheaply on eBay.
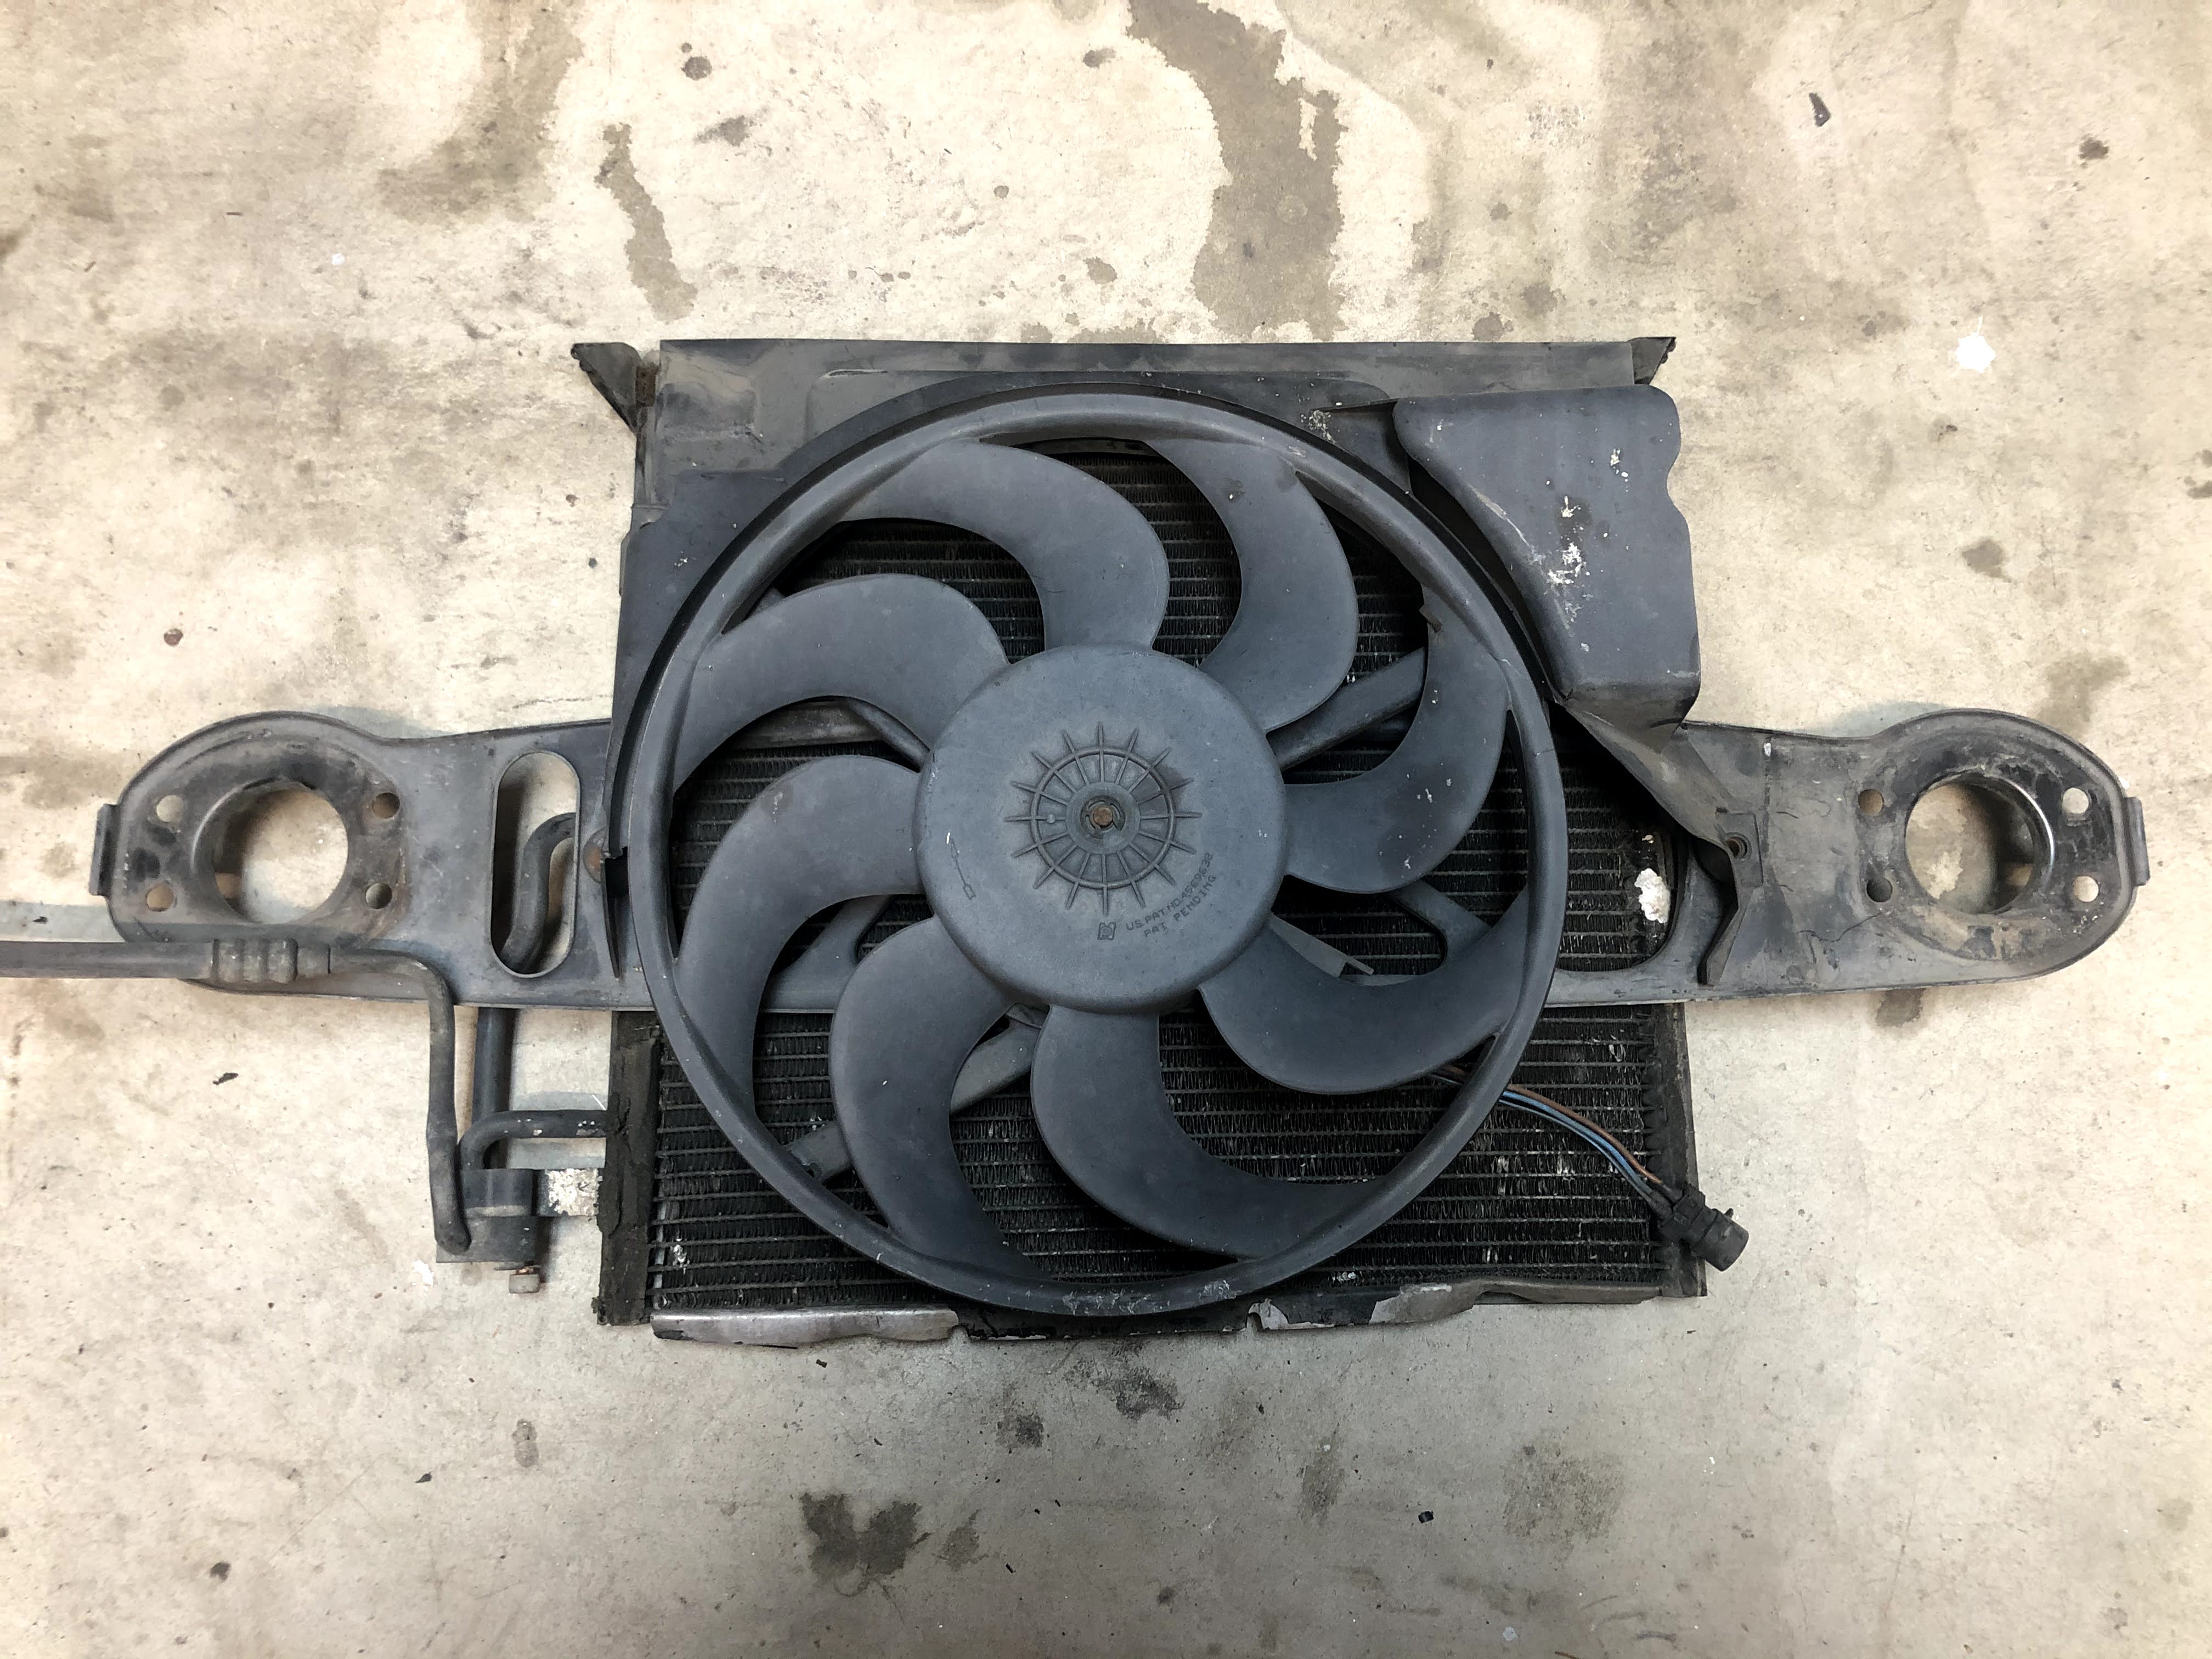
Step one was to decide on how to actually mount the oil cooler in the nose of my E36. I found pictures of numerous ways that people have done it but nothing seemed to match what I was looking to do. I wanted to keep the OEM auxillary electric pusher fan in the car (as it actually puts out a lot of air). I saw that the auxillary electric fan mounts to the AC condenser. Since I’ve deleted the air conditioner system, I could just use the frame of the condenser to both mount the oil cooler and keep the auxillary fan in the OEM location. You can see the stock setup in the picture above.

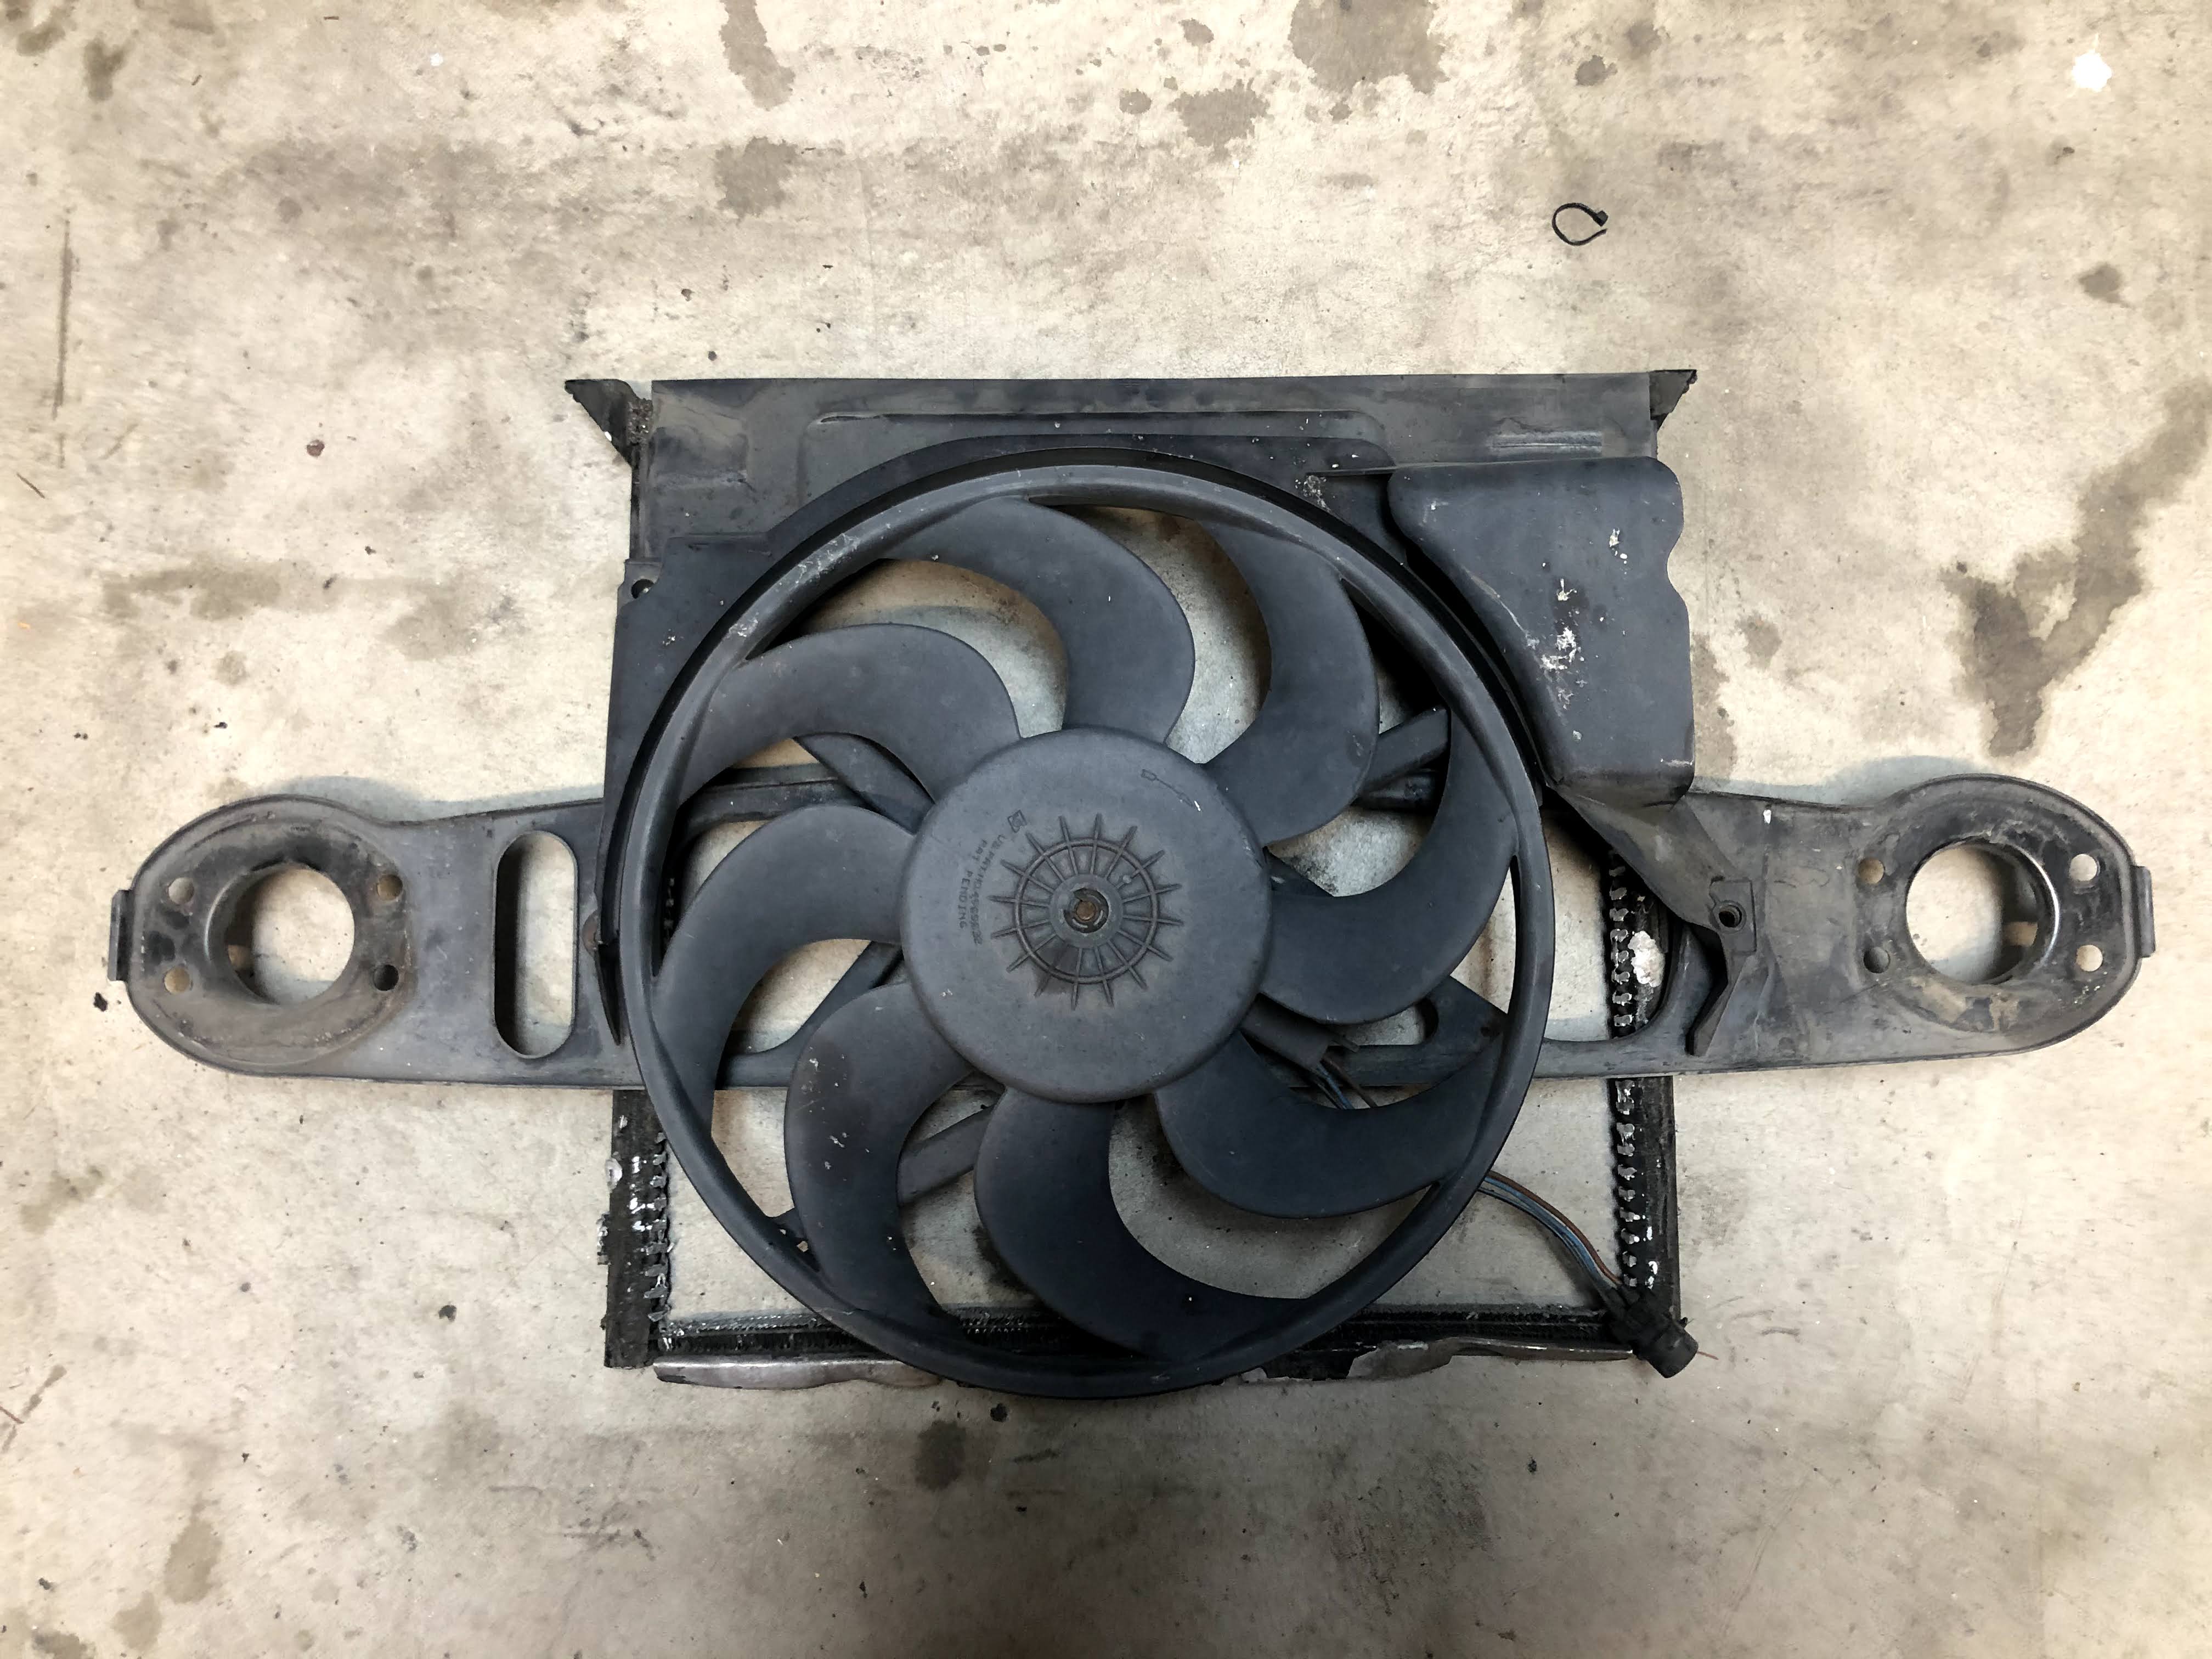
Here’s a picture with the fan removed. You can now see the four mounting points for the auxillary fan.

And here’s a picture of only the condenser. My plan was to cut out the core of the condenser, remove the AC lines coming into the side and keep the frame (with fan mounting points) intact. The entire condenser is aluminum.
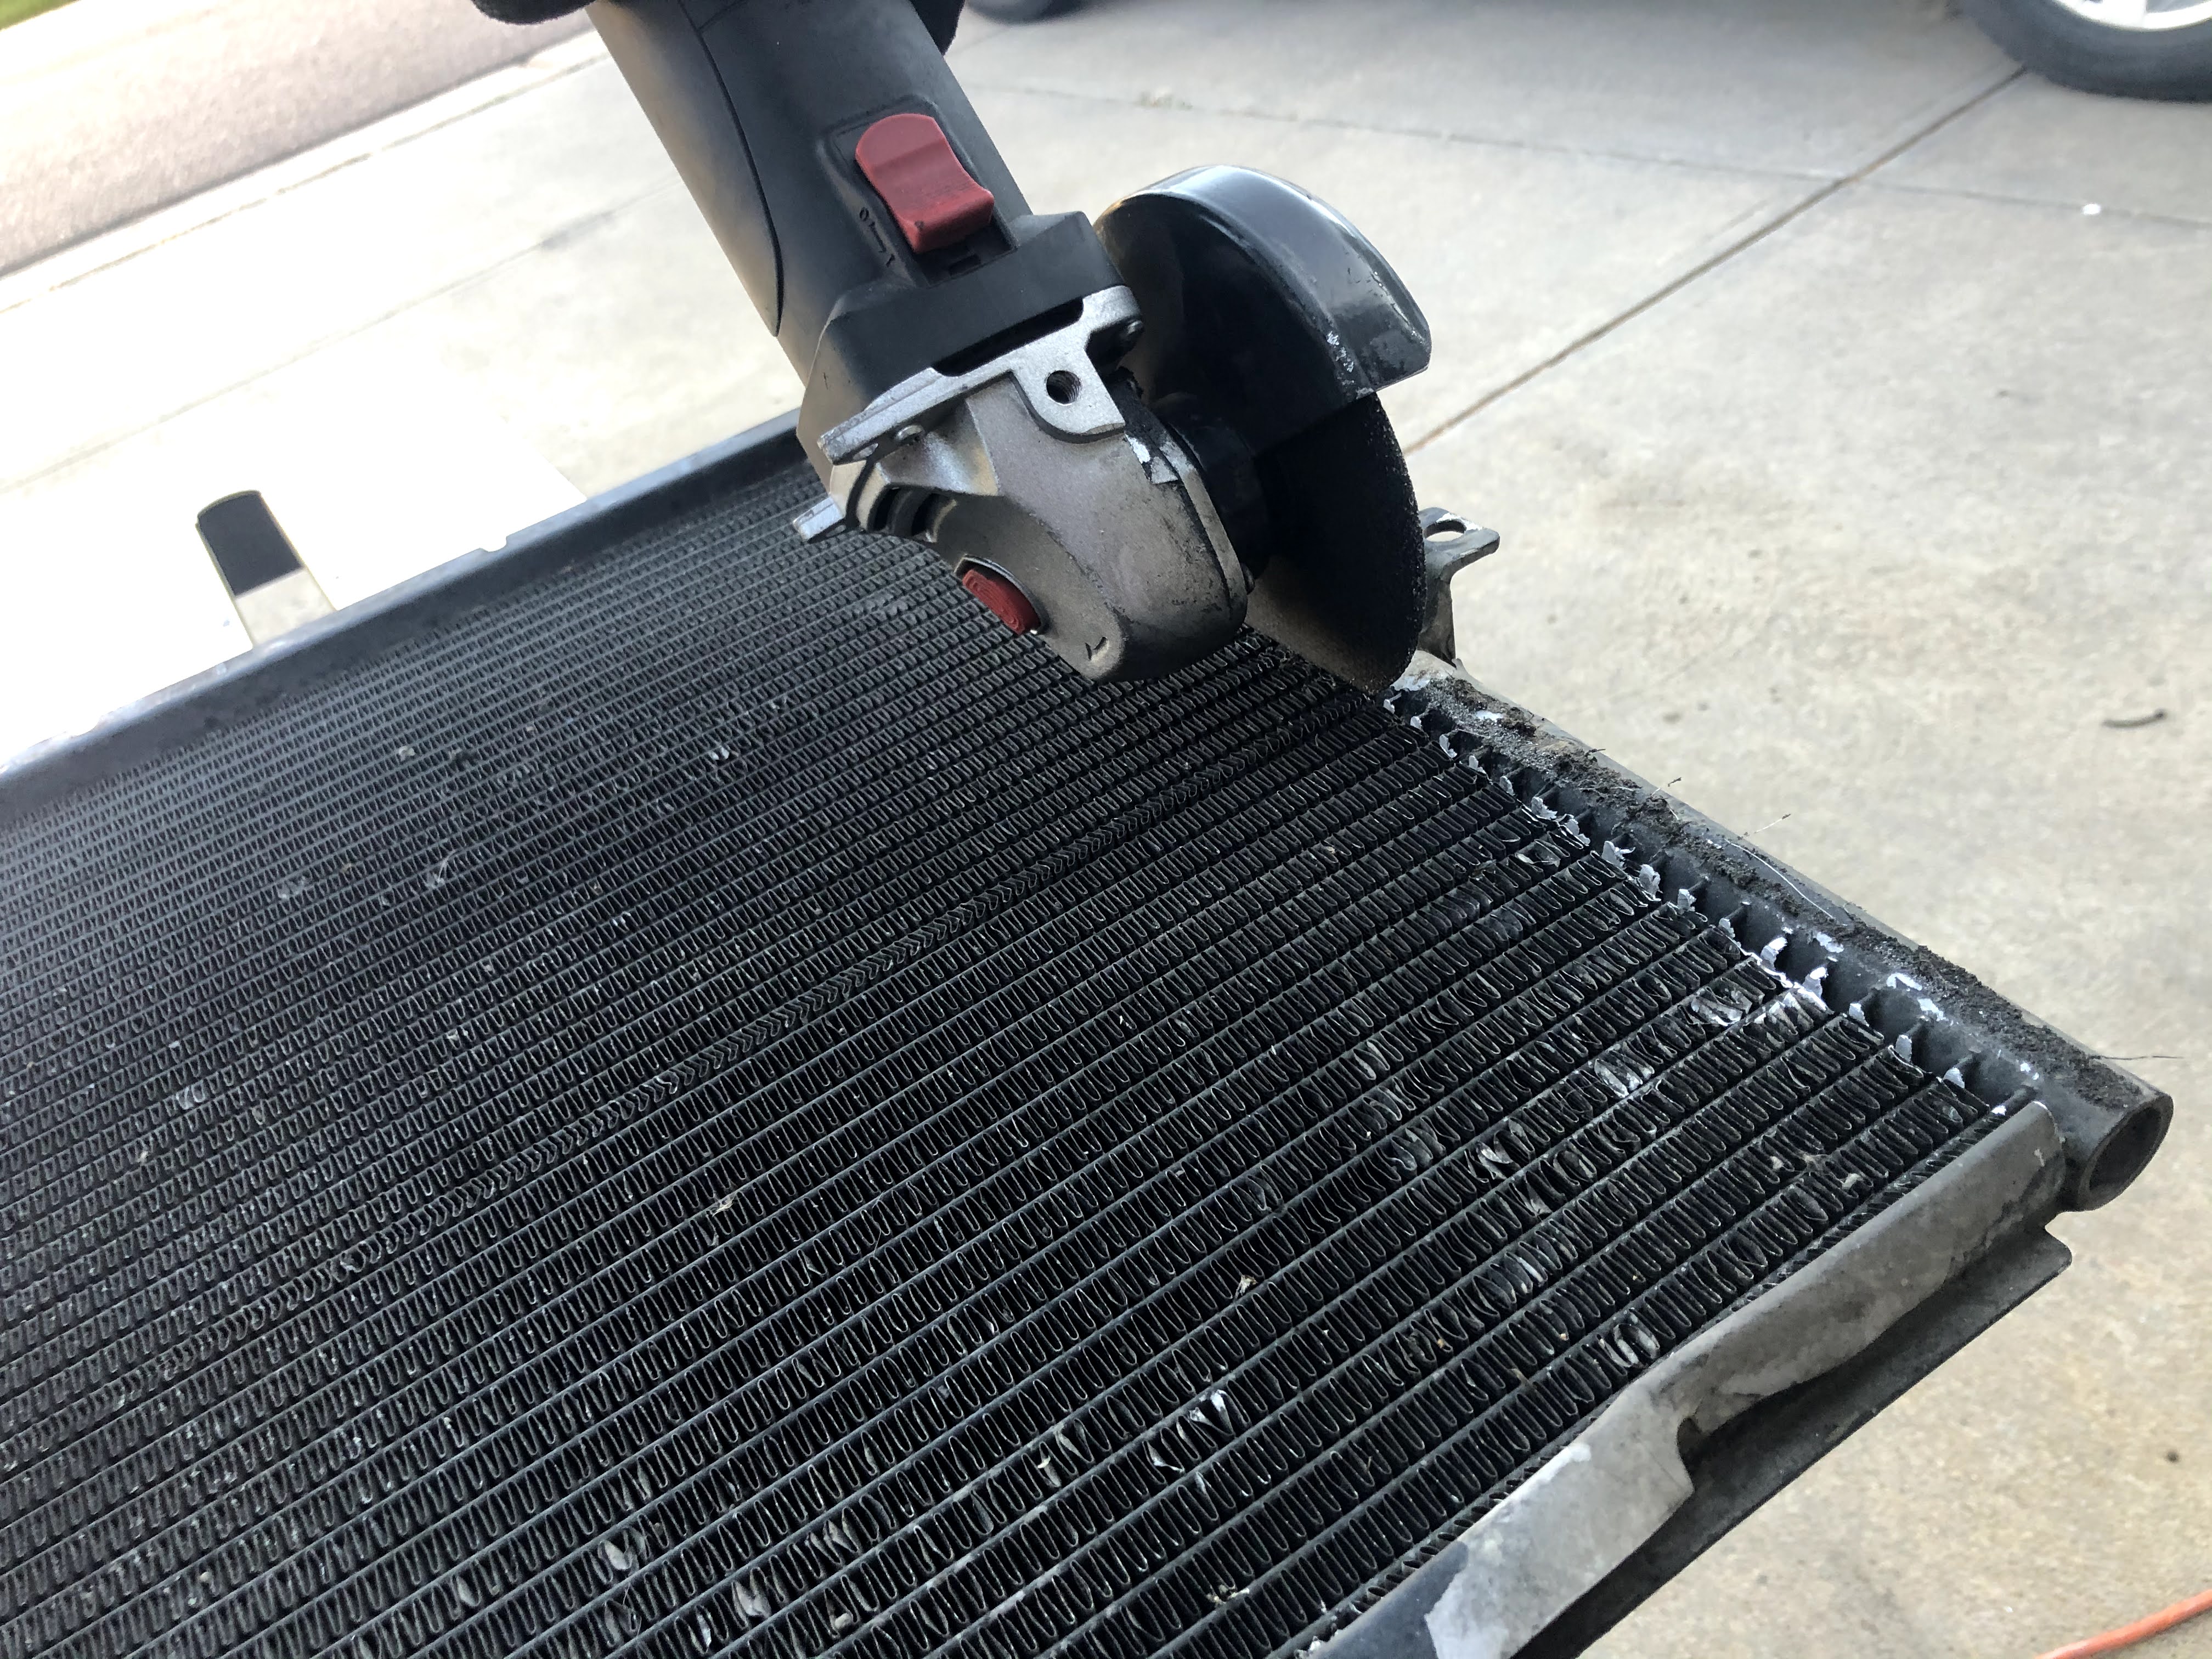
Cutoff saw in action!

Core removed successfully! I left the very top and very bottom rows in place in order to add a little more stiffness to the frame.
Here’s the fan sitting in place on the gutted condenser frame.

The backside of the condenser frame is now wide open to mount the oil cooler.

I placed some half sections of fuel line on the sharp edges of the cross beam. The oil cooler could potentially come into contact with these areas once mounted and I wanted to take some precautions.
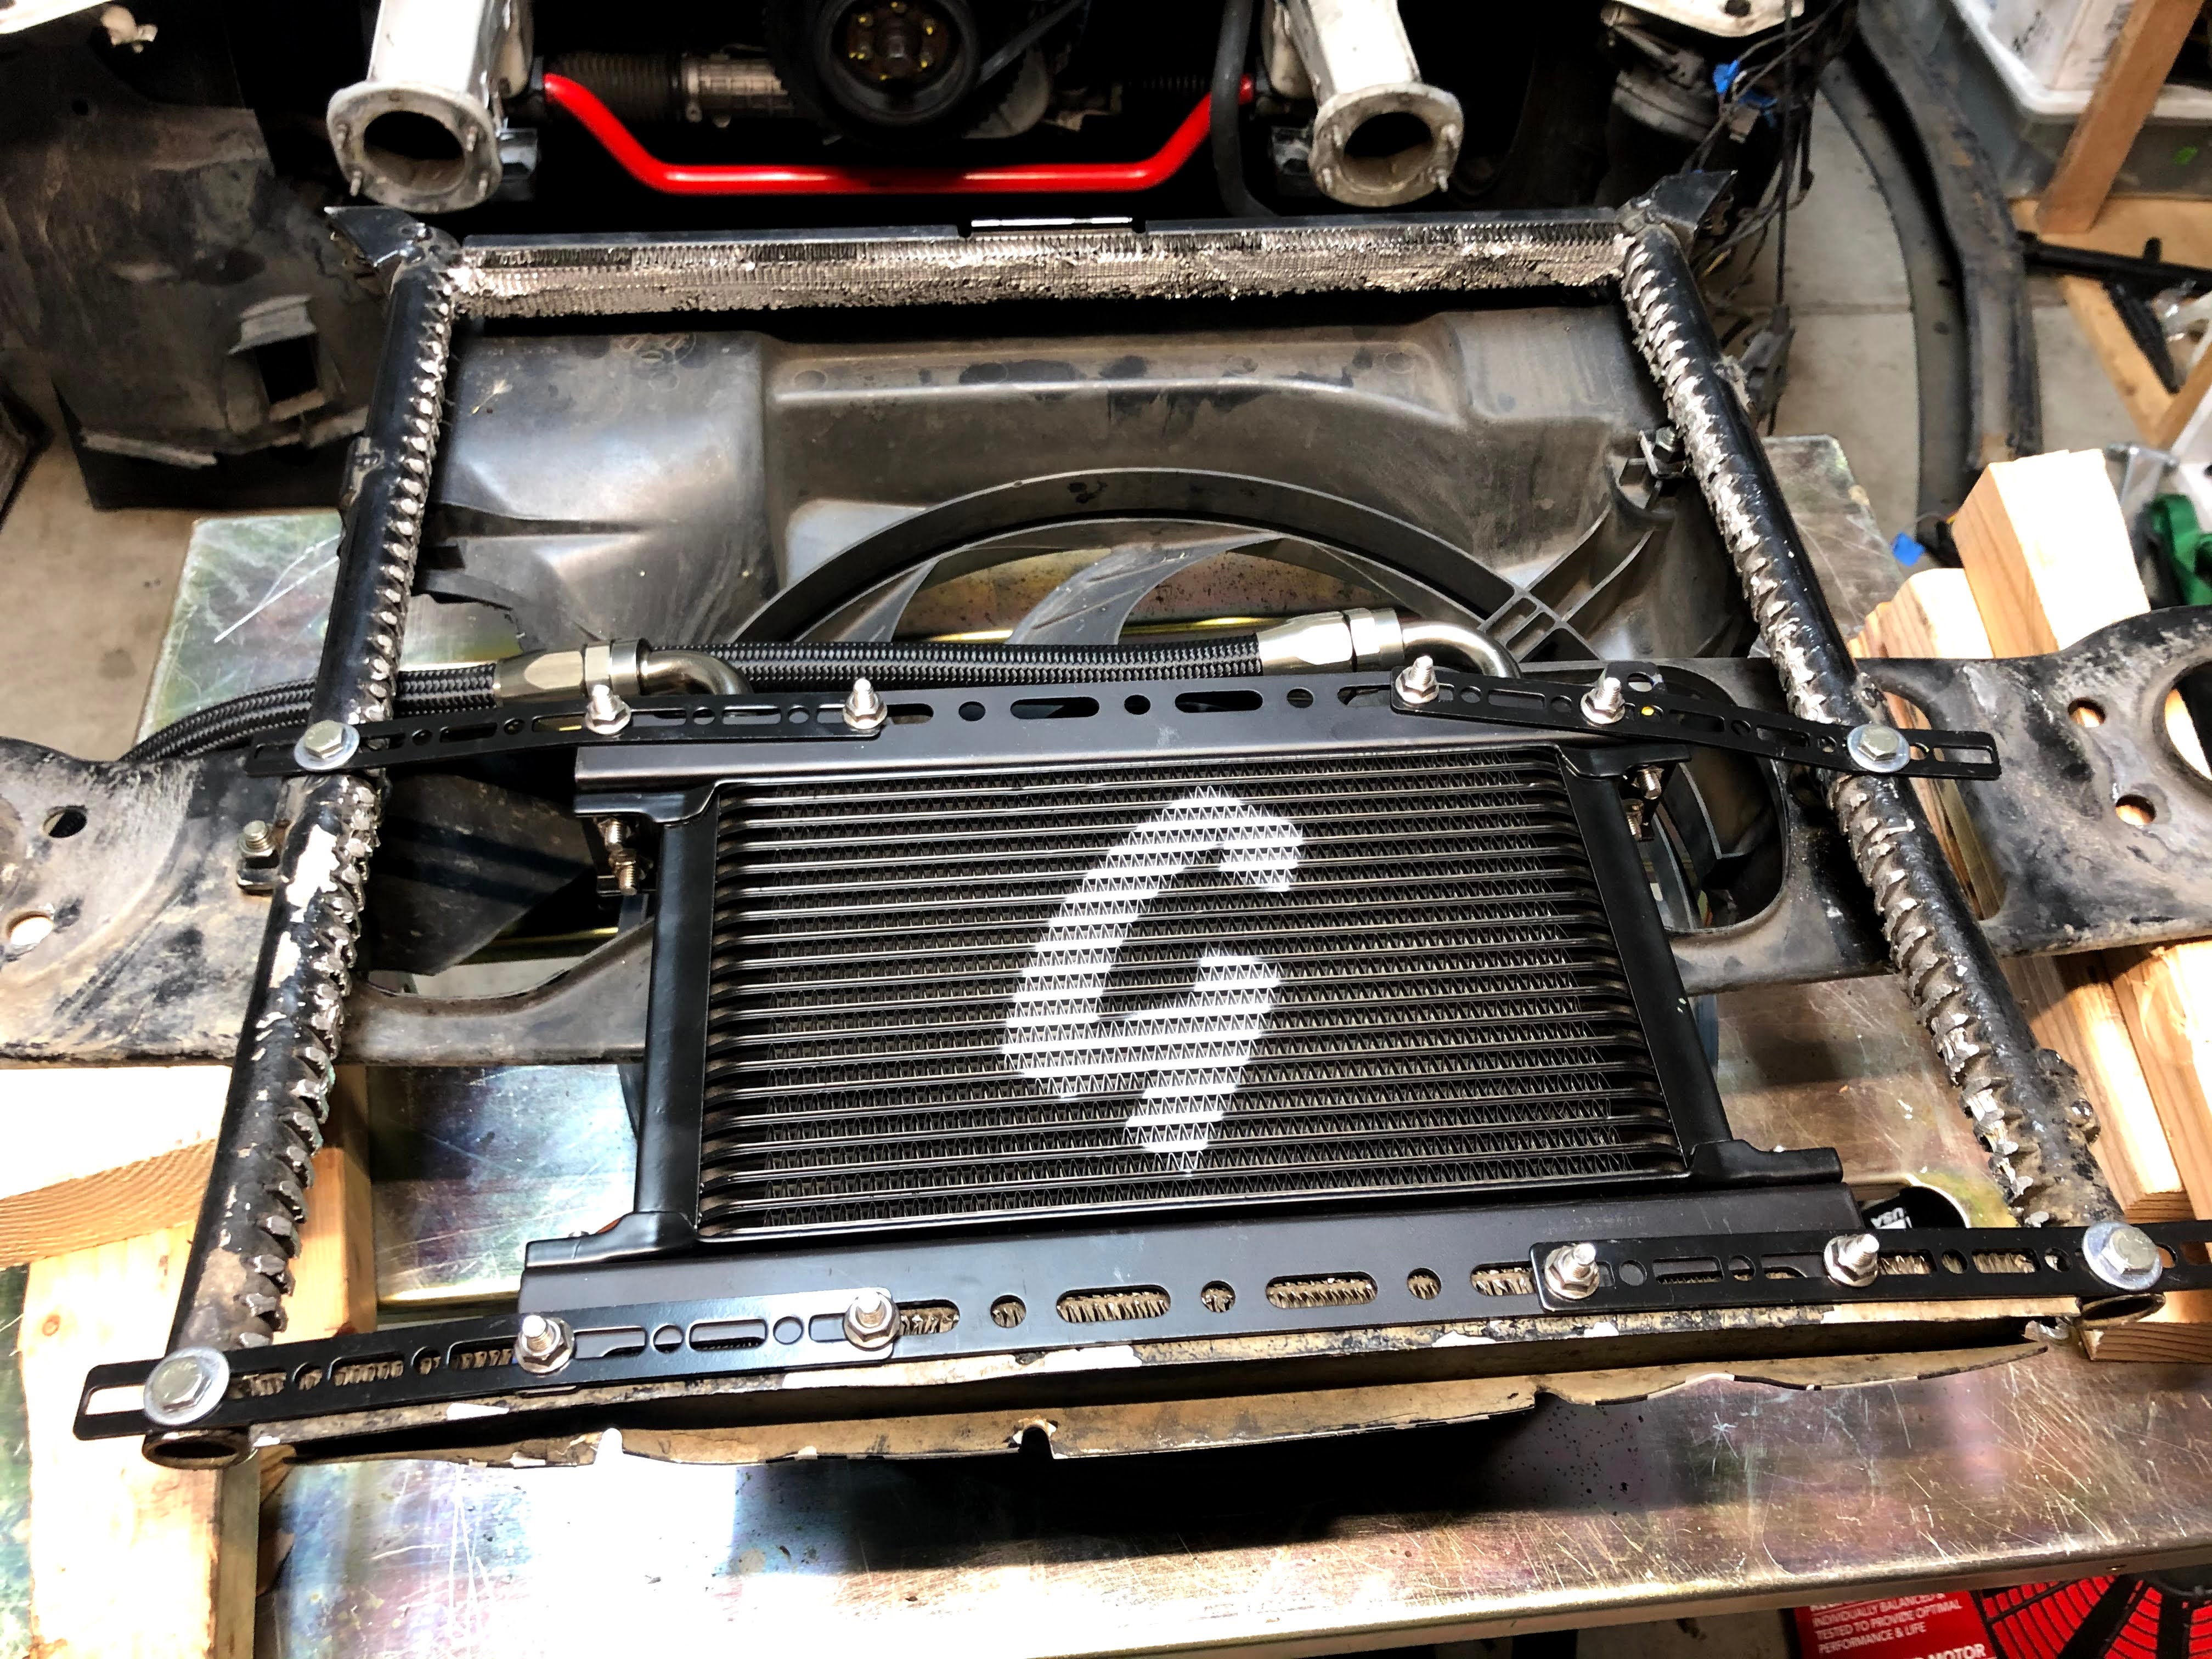
I drilled some holes in the side tubes of the condenser frame, connected brackets to the oil cooler eBay mounts and bolted them in place on the frame.

The oil cooler lines exit the area through a gap between the condenser frame and cross beam.
The whole setup mounted in place into the E36 just like the stock setup, no issues at all.

However, you can see that the universal lines were way too long and needed to be shortened. I also needed to determine the exact routing to take for the lines but knew that I had to get more of the front end in place before cutting anything.
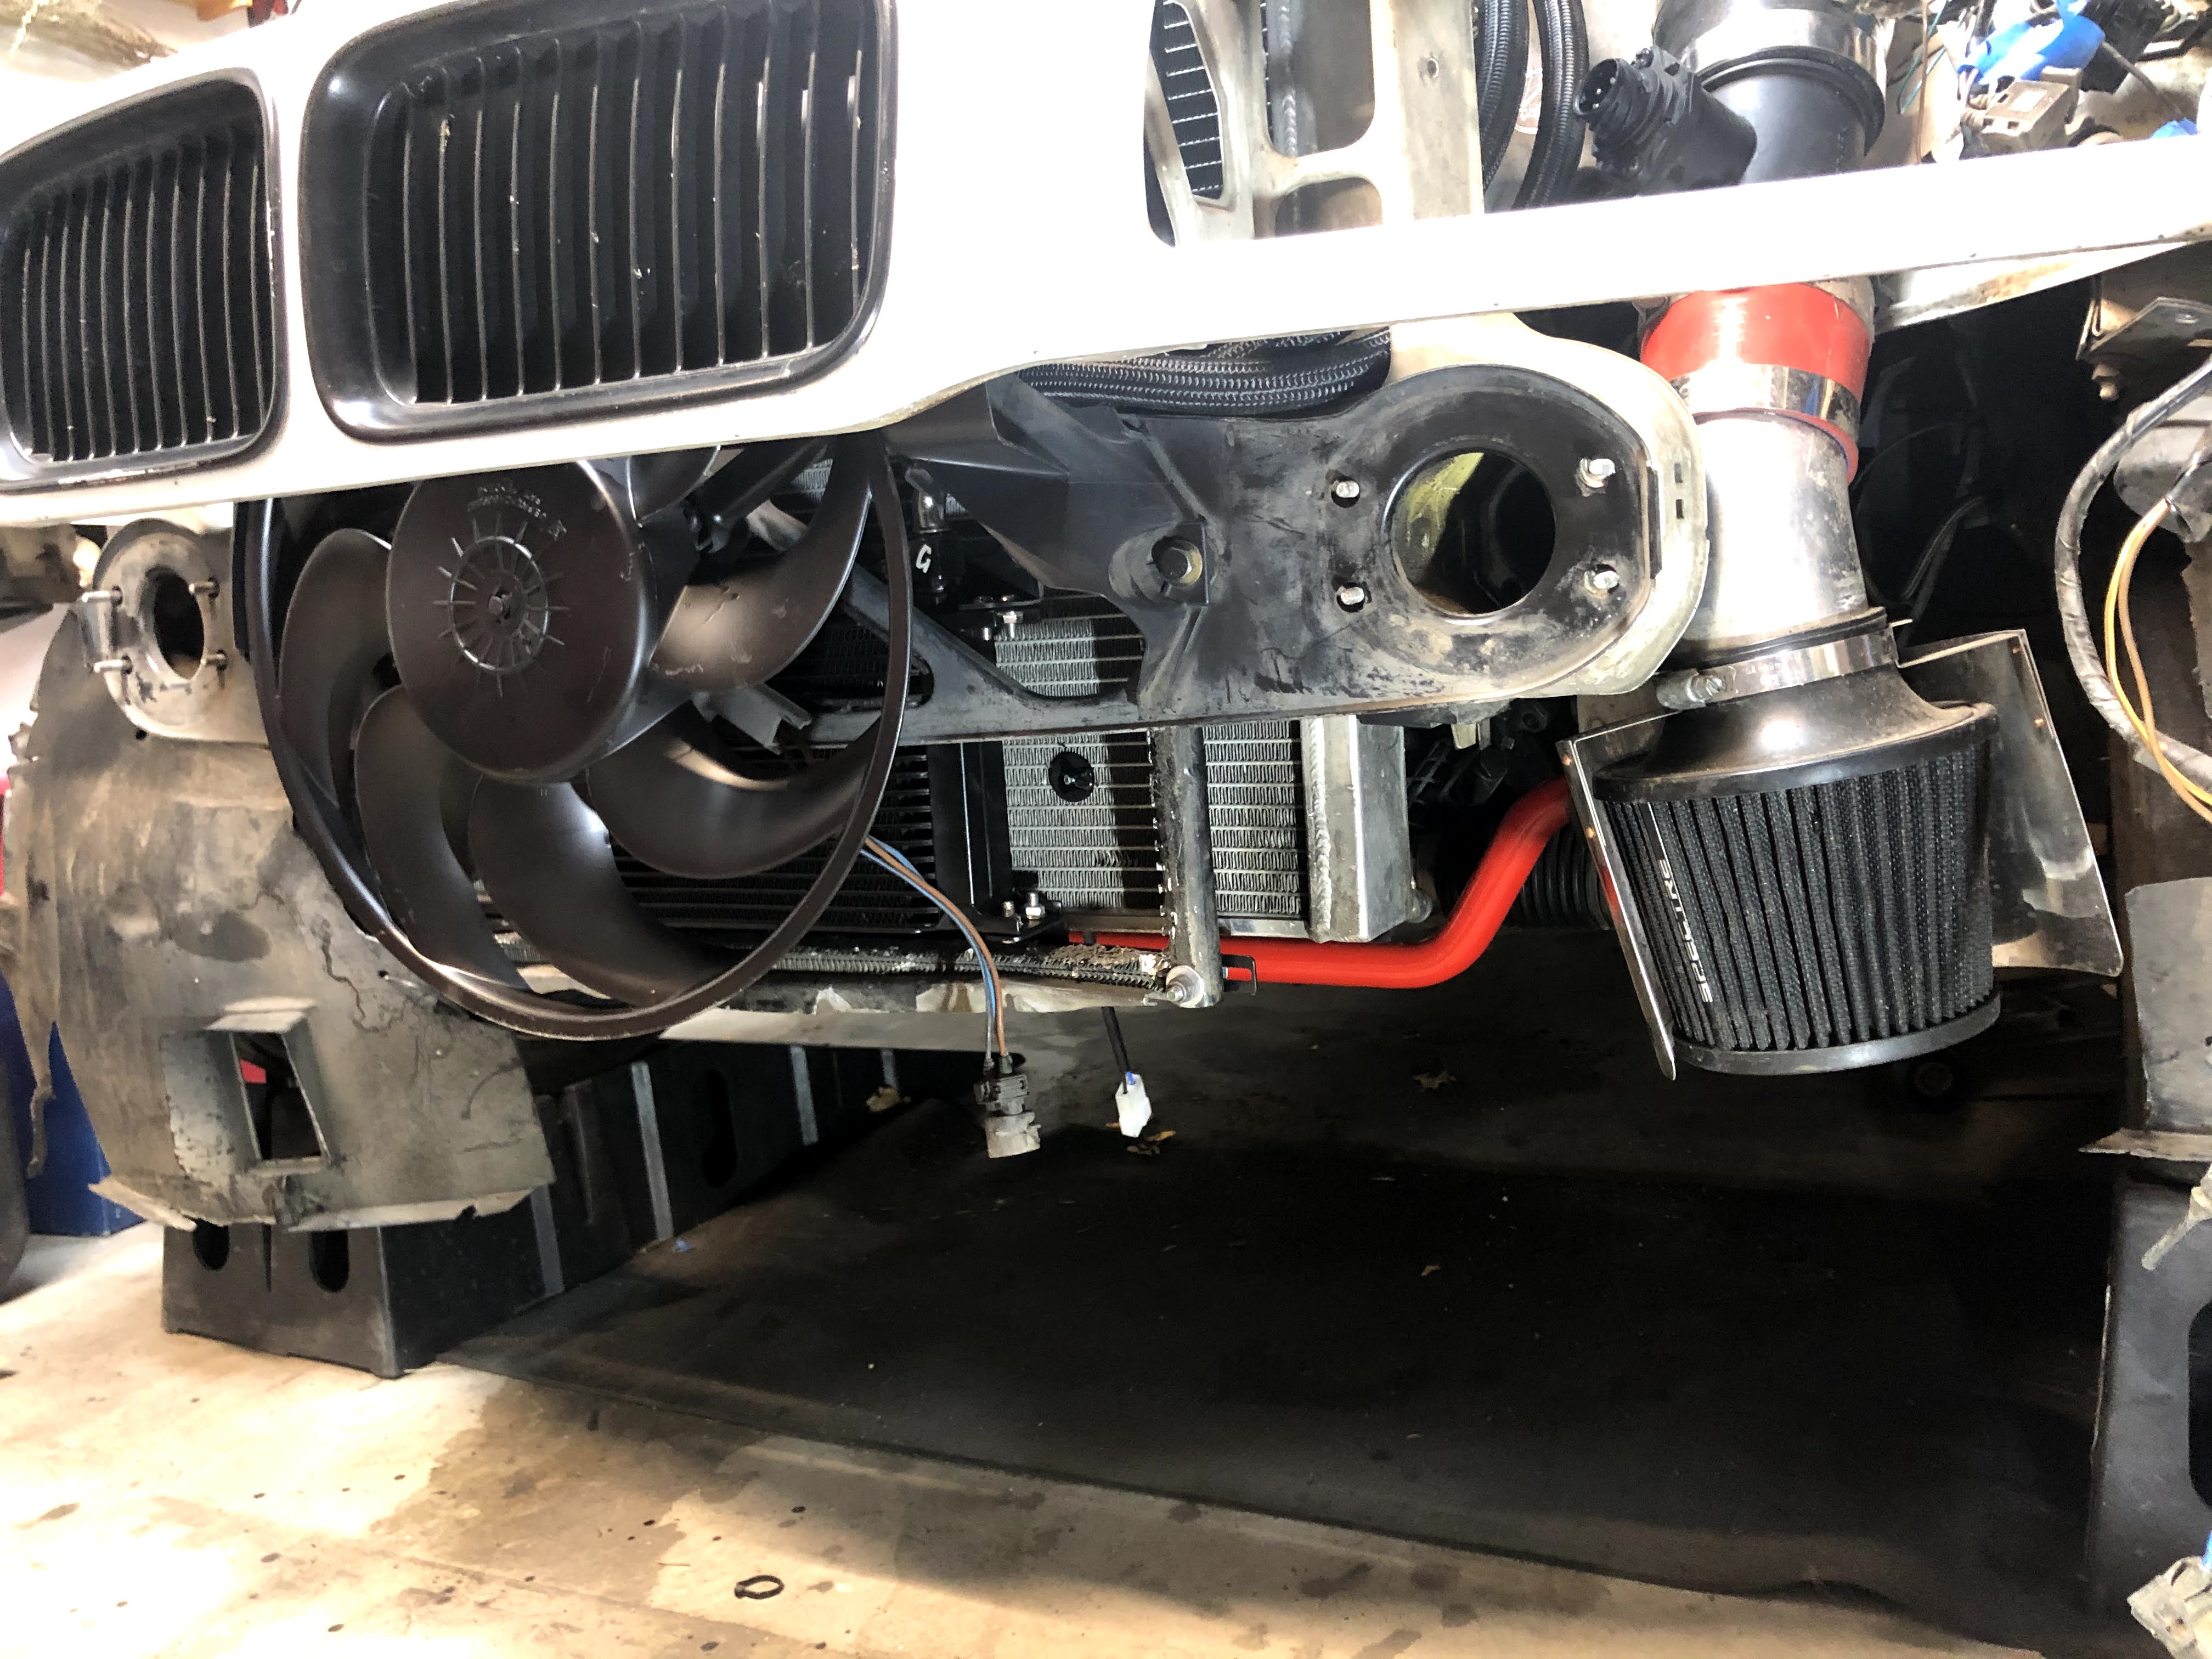
With the upper grill beam in place, I decided to route the lines through one of the rectangular cutouts.
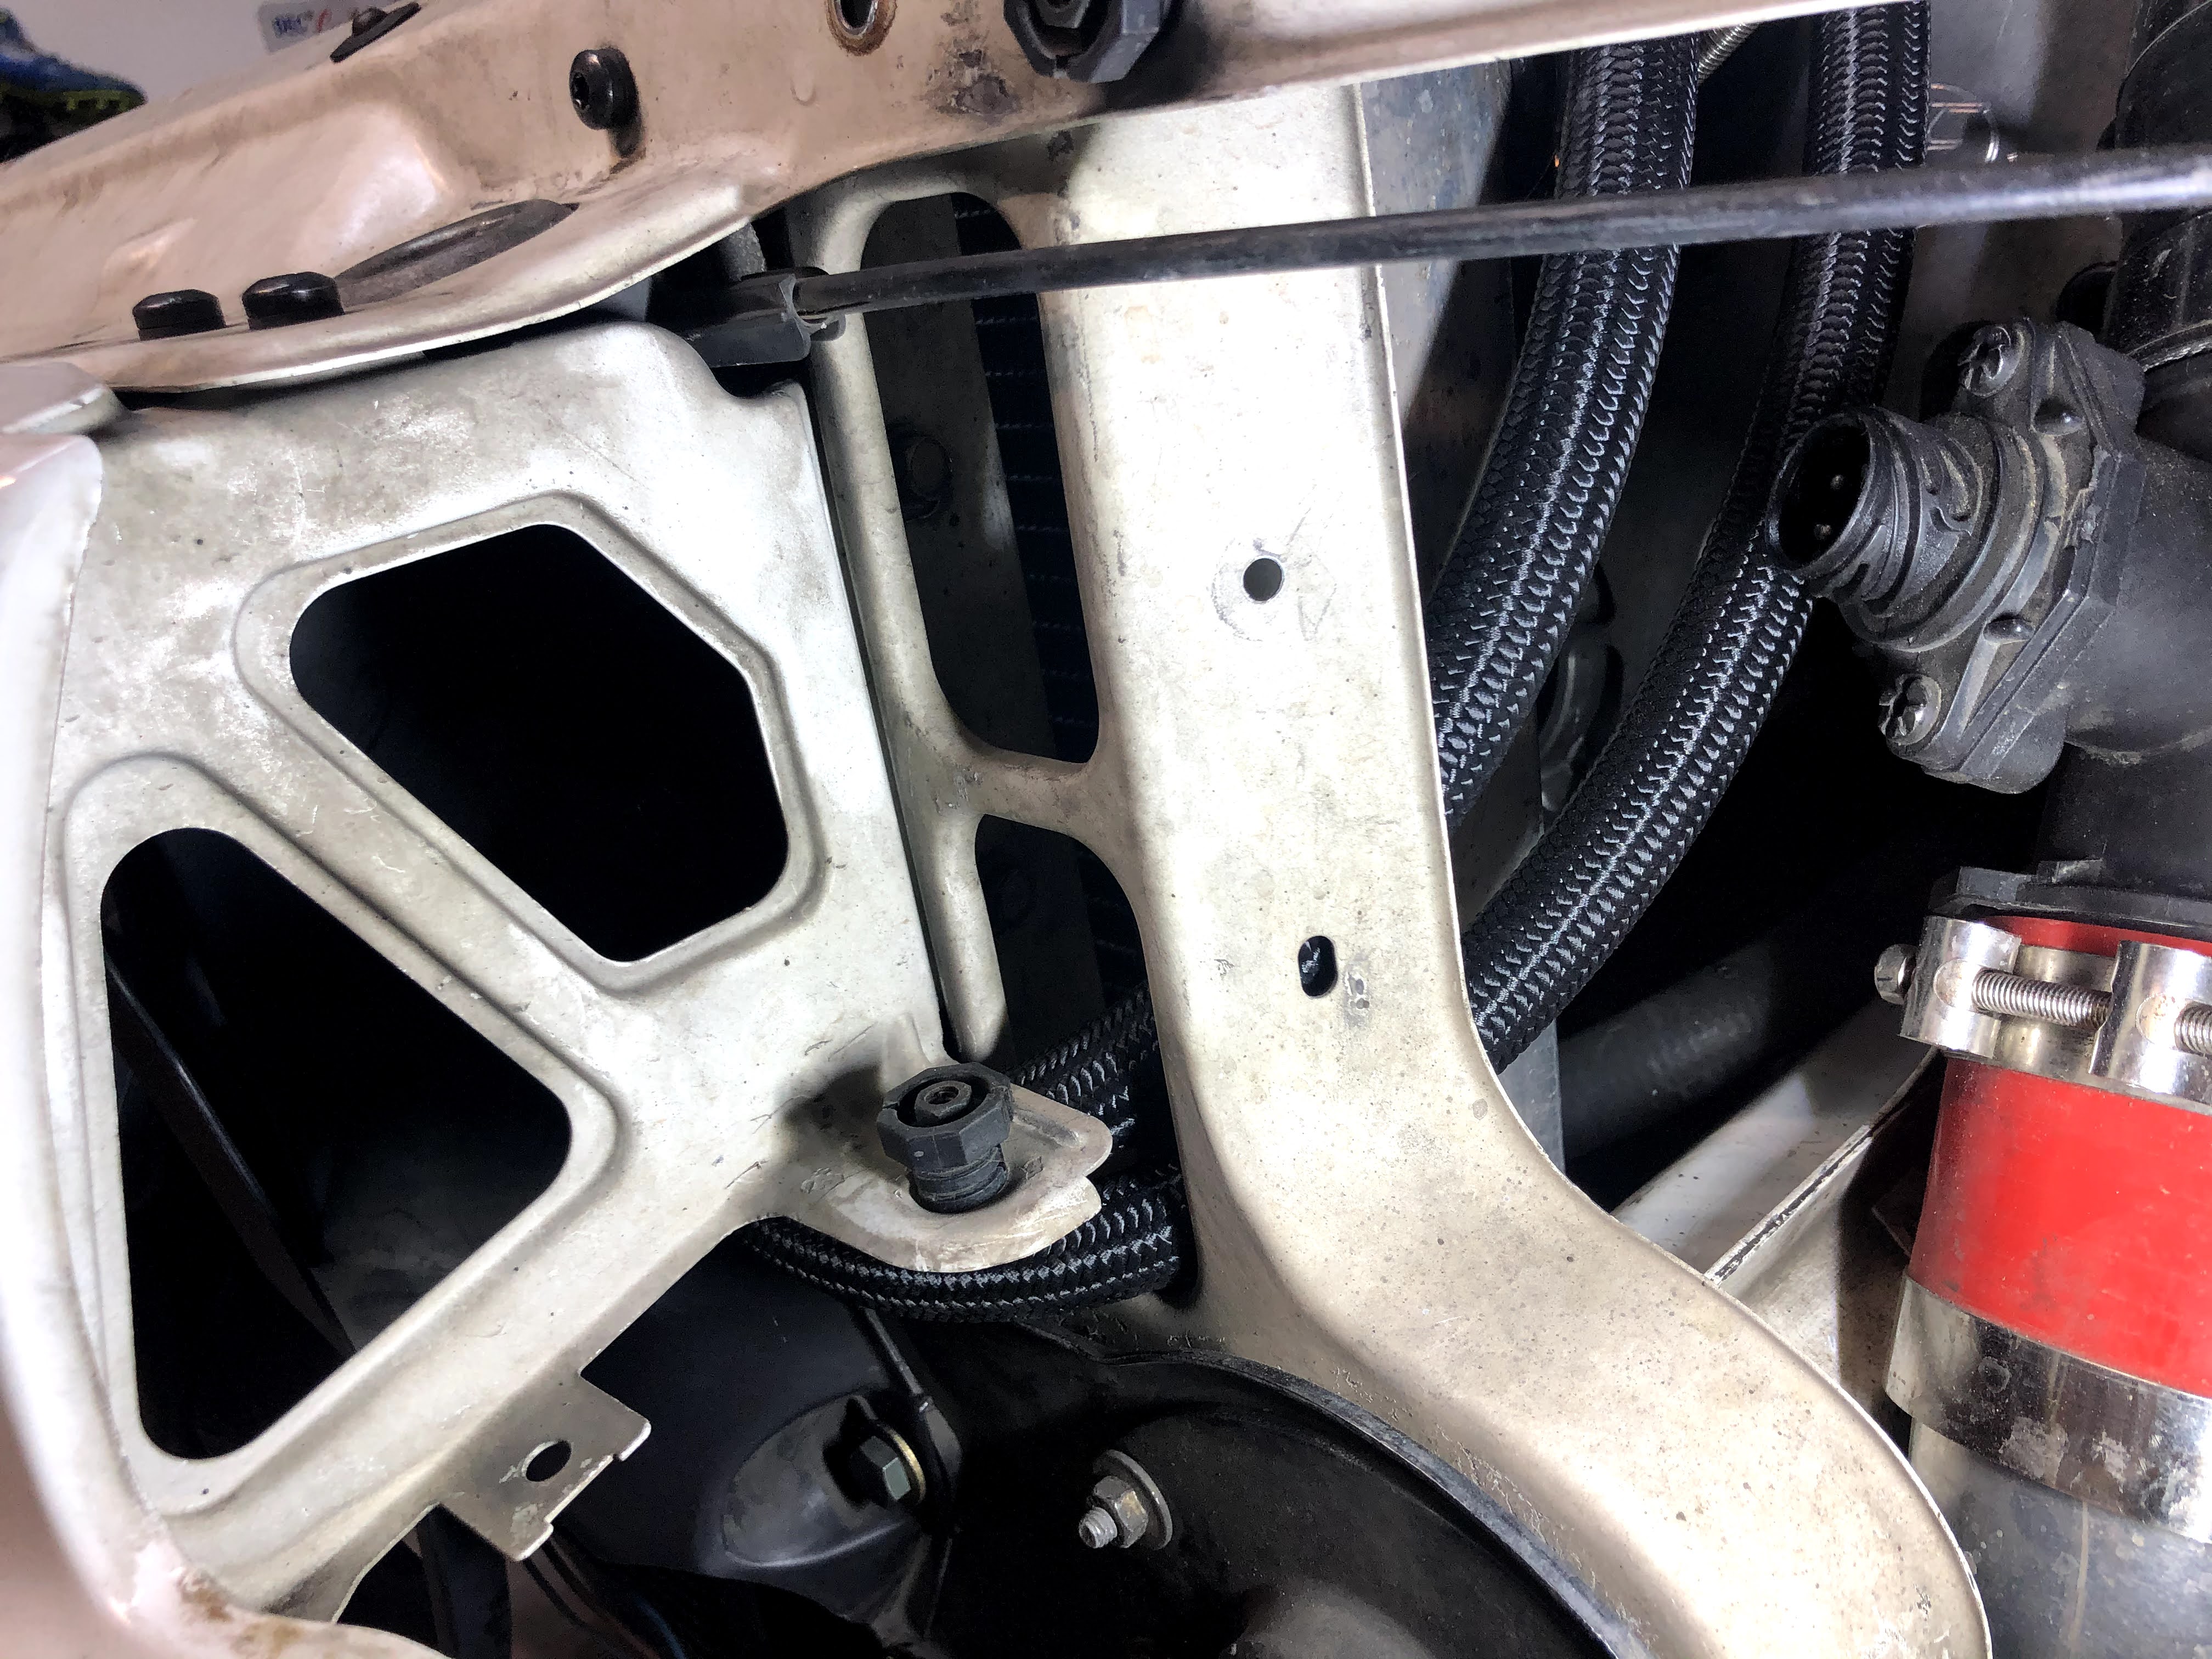
A closer view of the cutout that I routed the lines through. For reference, the black mounting nub is the headlight height adjuster.

The superharger makes routing the oil cooler lines a little more difficult but it still works well. I used several high strength zipties to pull the lines towards the radiator. I don’t want the lines to accidentally come into contact with the supercharger pulley. There’s about 2″ clearance between the lines and anything that moves. It looks to be sufficient.
I’ve now run the car fairly gentley for about 125 miles, trying to break the clutch in properly, but WOW it’s quite the beast now! The sound it makes with the new cams, equal length tube shorty headers and increased displacement is astounding. My brother-in-law rode in the car with me for the first time and he said it was a super rush of adrenaline for him and sounded like a Nascar, ha ha! I was a bit bad and couldn’t resist mounting my Dragy GPS device in the car and taking it for a quick run. Traction is very hard to come by for sure (as is air at 6500 feet elevation), but, on a closed course with a less than desirable surface, I was able to run 0-60 in 4.7s and the 1/4 mile in 12.9s (with a terrible 2.2s 60 foot). It’s quick and runs like a champ with no codes thrown, leaks or issues. It’ll be ready to rock in the racing season!
If you liked the information in this page, be sure to check out my Developments page for my most recent posts! Every single post is listed with a link on the Headquarters page.
Links:

Thanks so much for the update – one small suggestion – you can set the images you post to link to the full size version in WordPress – would be helpful!
LikeLike
Scott, good call! I hadn’t realized that WordPress changed the default to not linking to images in their recent release (for whatever reason!). I’ve fixed it and you can now click on each picture to make it bigger. Thanks for letting me know!
LikeLike
Hi Scott,
I’m Nick and I am down in the Springs. I ran into your page searching for install information about electric fans while maintaining the condenser fan in my E36 M3 sedan and saw your page. I wanted to know how you wired the SPAL fan and still maintain the condenser fan operating. Any information you could give me would really be appreciated. Thanks and awesome build!!!
LikeLike
Nicolas,
I’m actually Brent (Scott was just another person leaving a comment), but good to hear that you’re enjoying the site! I actually used the SPAL FRH Fan Relay Harness (~$35) and wired the fan in completely separately from the condenser fan. There are pretty straight forward instructions and diagrams in the harness kit. I then used a simple $5 toggle switch to turn the fan on and off. It’s not using a temperature sensor to activate. That way I can turn it on all the time at low speed or when idling so the car doesn’t even start building temperature to an activation point. You’ll just need to remember to turn flip the switch!
LikeLike
Brent,
Sorry for the late reply and apologies for the confusion. I am almost done with the fan setup and also plan on running a toggle switch for it. I appreciate your response. I should have everything buttoned up by Wednesday and the cooling system bled. I’m still scouring over your posts and may have a question for you later about your shorty headers installation. Thanks again.
Nick
LikeLike
I’ve been meaning to put together a post about the Turner shorty headers. I’ll try to get to that soon!
LikeLike
You are the man 🙂
LikeLike
Fantastic build! I just found your page and appreciate you sharing your project. I’m going to keep reading your posts and check back often. I have an Alpine White 1998 323is that I am considering building up as a fun street/track car and your car inspires me.
LikeLike
Glad to hear it! Good luck in your build!
LikeLike